 Support center
 Contact us
How to germinate cannabis seeds the Serious Way?
This step-by-step germination guide comes directly from Simon, the Breeder of Serious Seeds, developed over decades of experience working with cannabis genetics.
There are many reasons why germination can fail – after all, it is a product of nature and we don't have full control over the outcome. However, by following this proven method, you can significantly increase your success rate and give your seeds the best possible start.
We highly recommend following this germination method, which is also required to qualify for our germination guarantee. To ensure you have a Serious Experience, take your time with each step and pay attention to the details below.

- Take a piece of kitchen paper towel.
- Make the paper wet. Tap water is ok, but if you want to kill all fungae and bacteria on the seeds you can wet the paper with a mix of 1 part of 3% hydrogen peroxide with 5 parts of distilled water.
- Let excess water drip off.
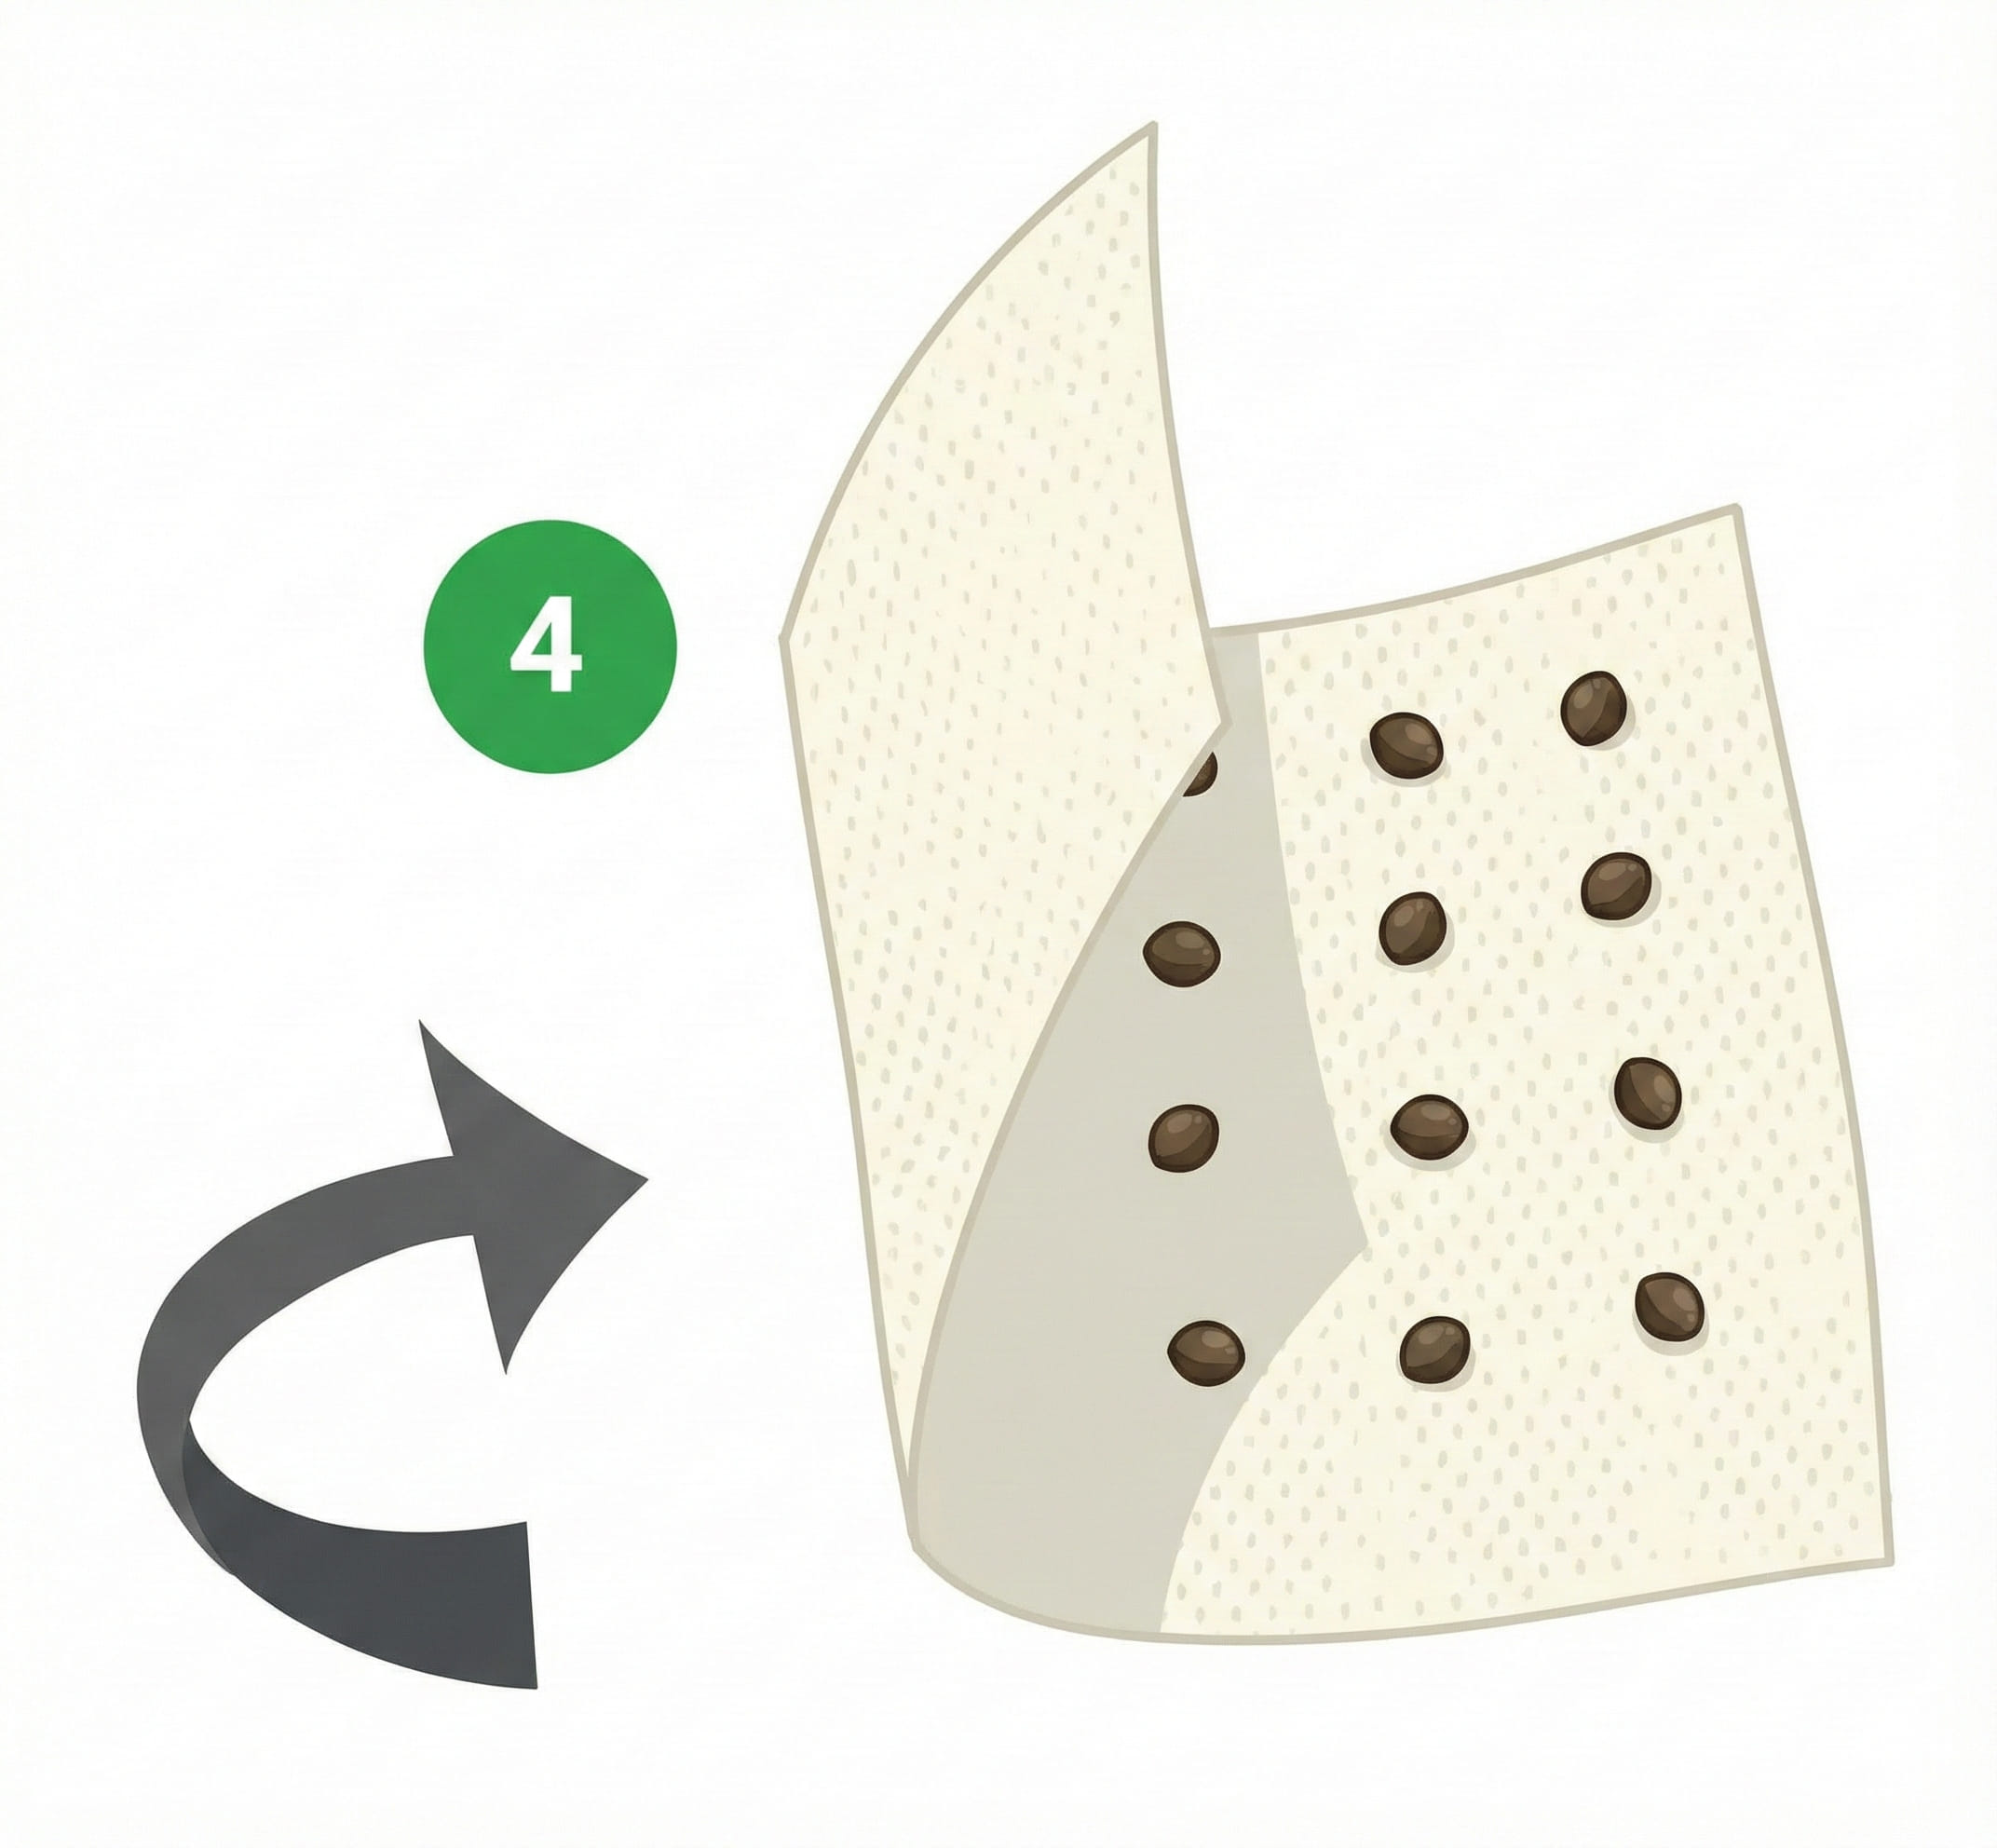
- Divide the seeds over half of the paper and fold it.
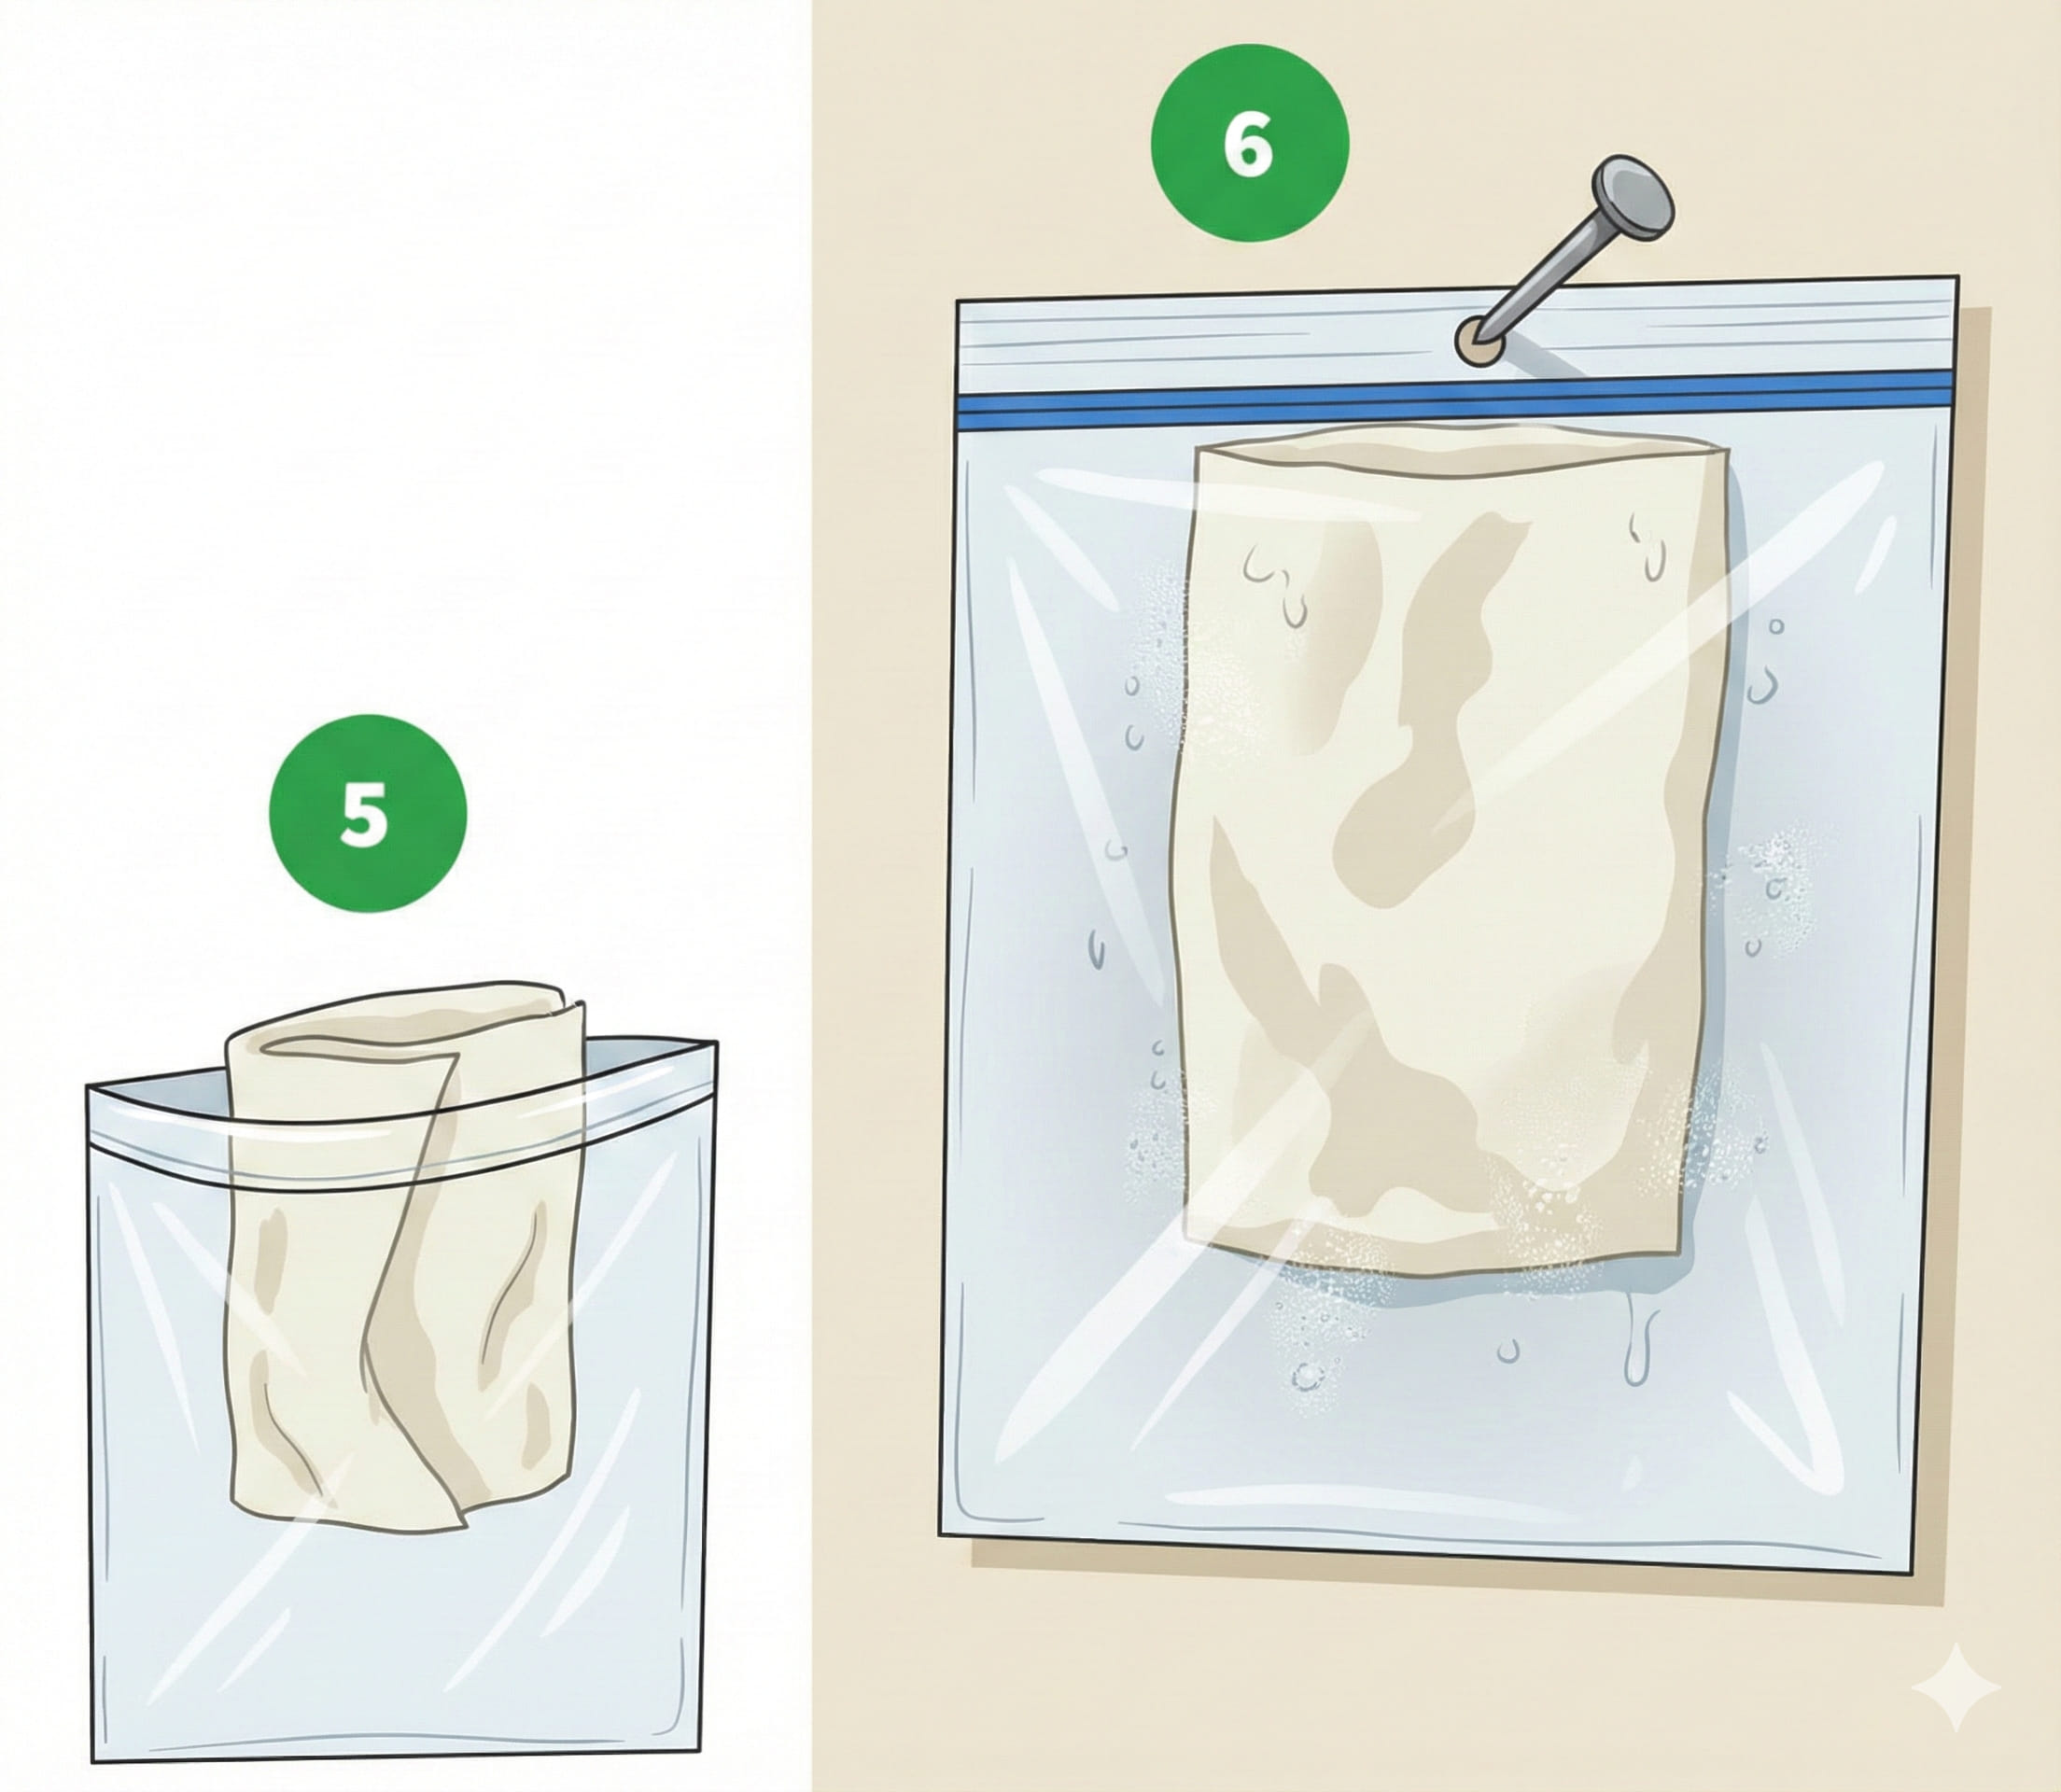
- Put the paper inside a zip bag so the paper stays wet.
- Hang the paper up vertically, water will collect at the bottom of the baggie. Lifting the bag horizontally every 2 days keeps the paper wet.
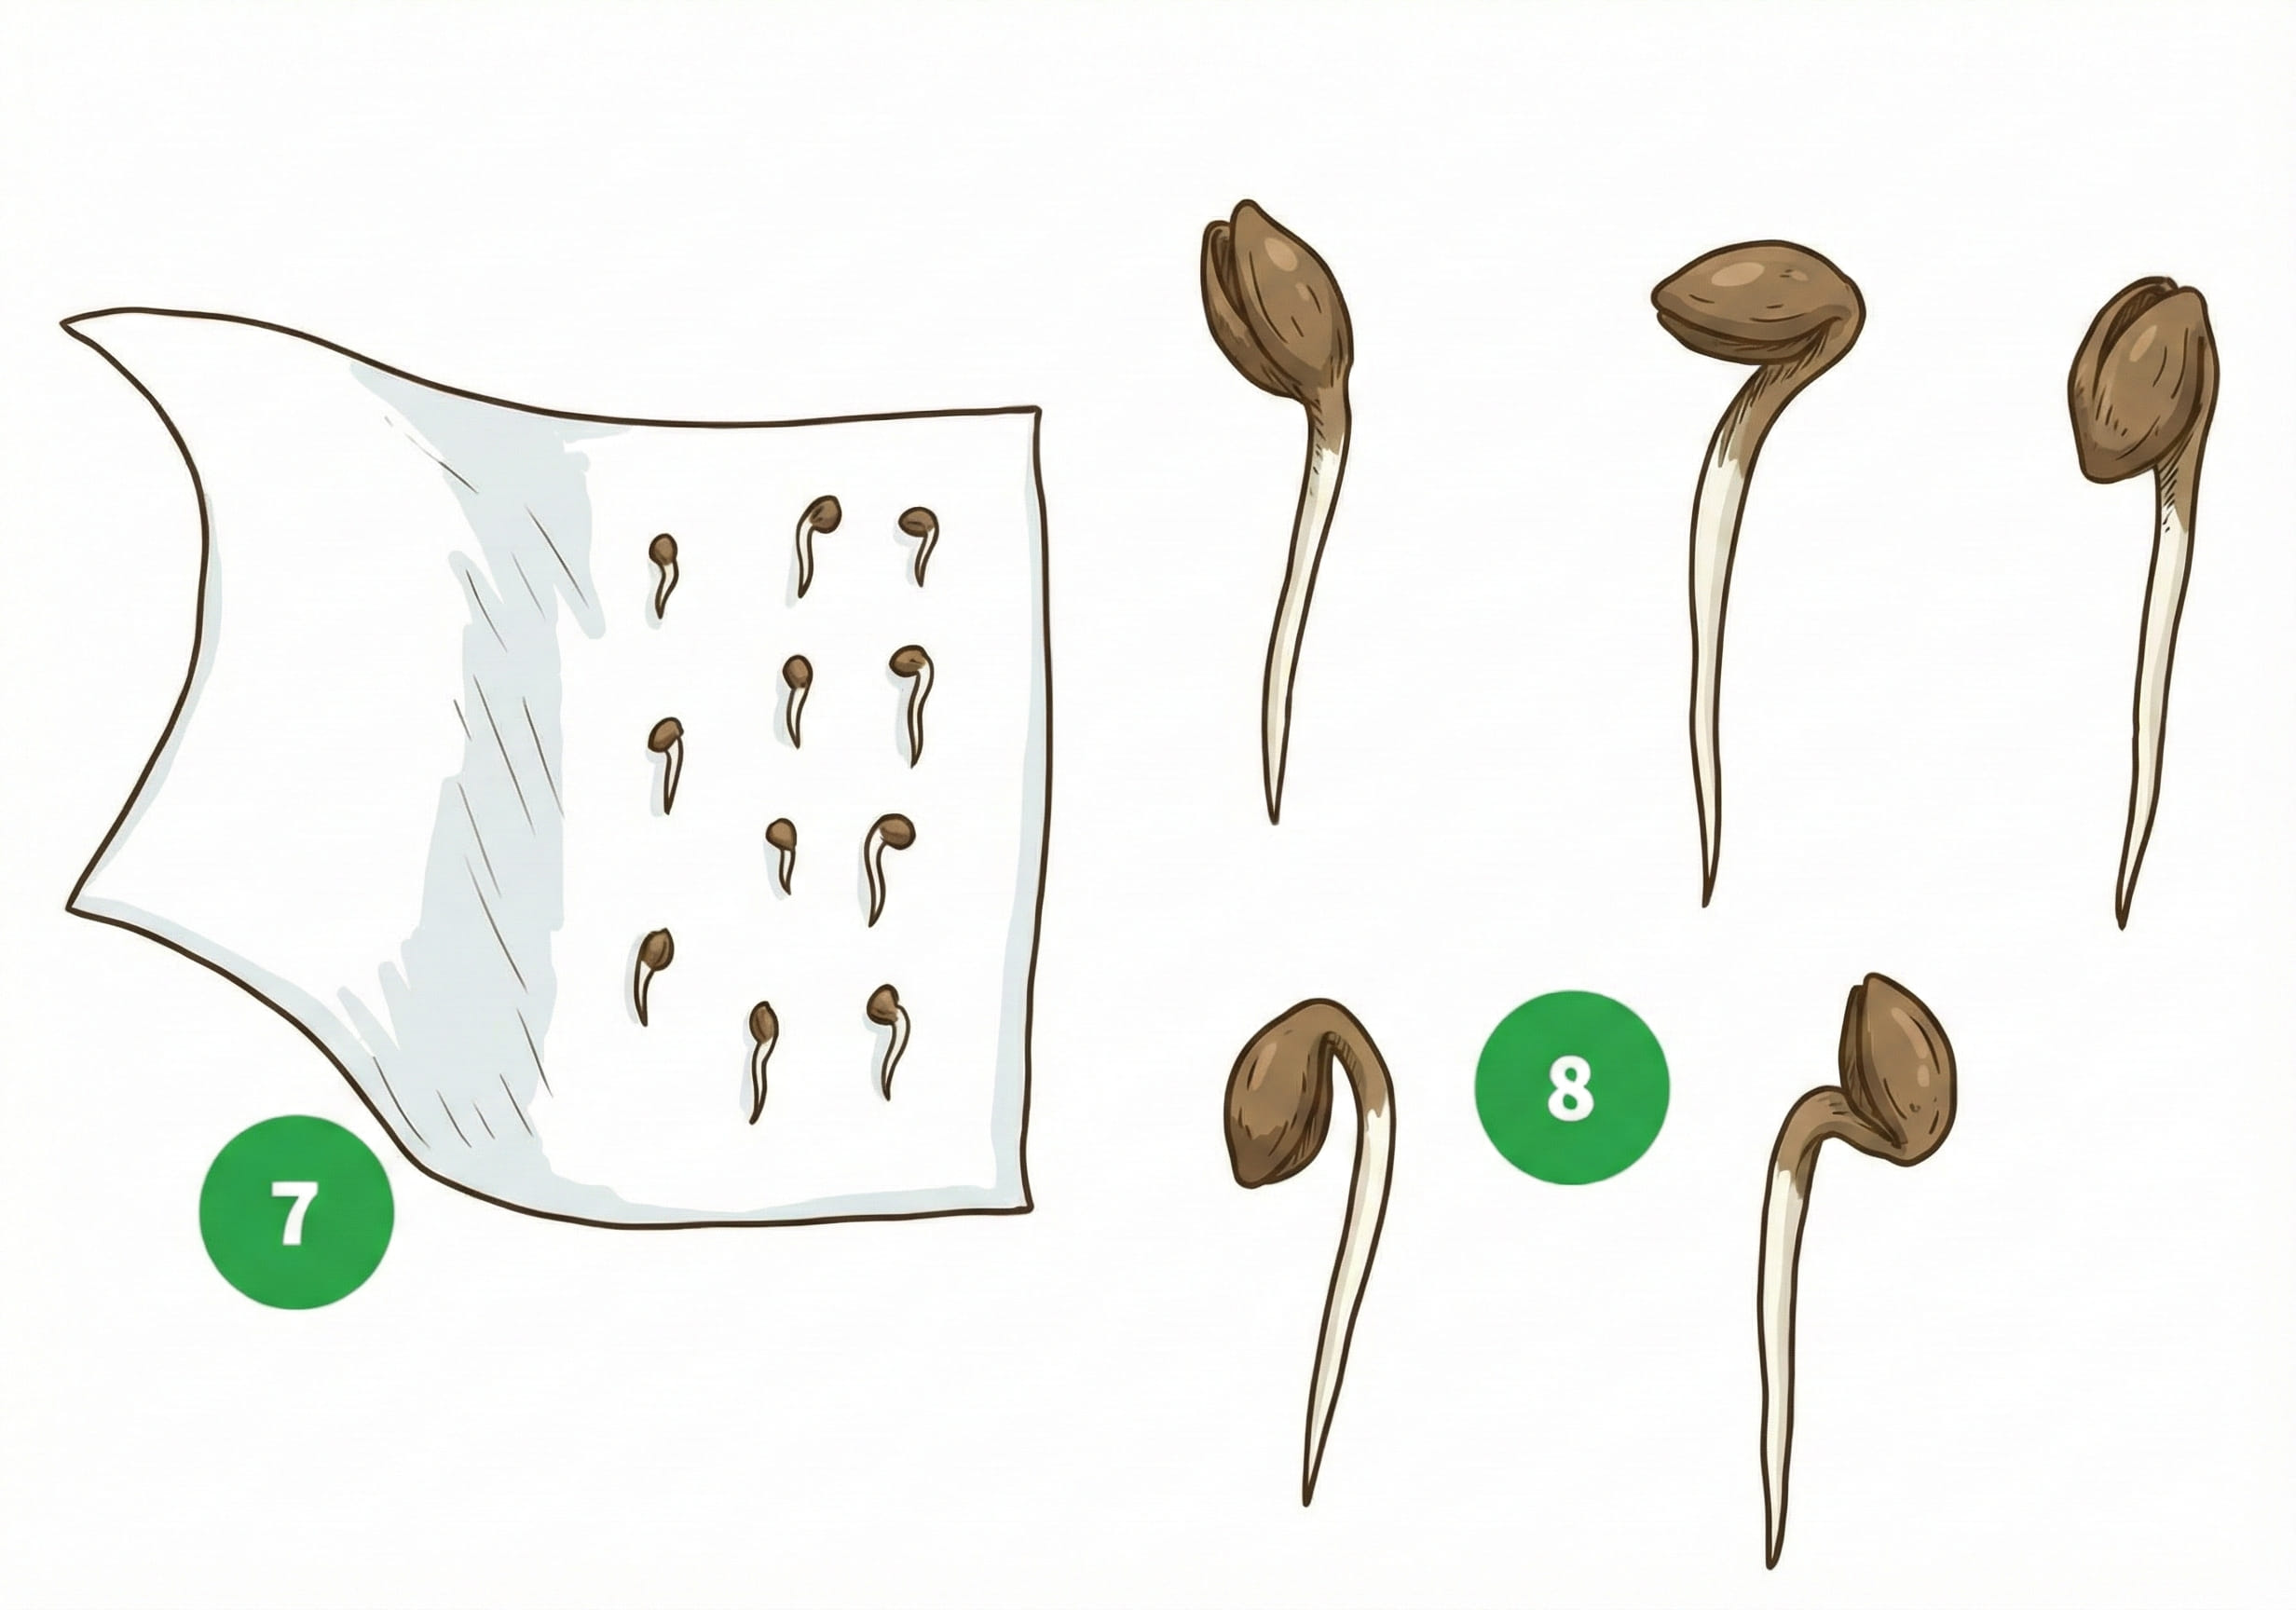
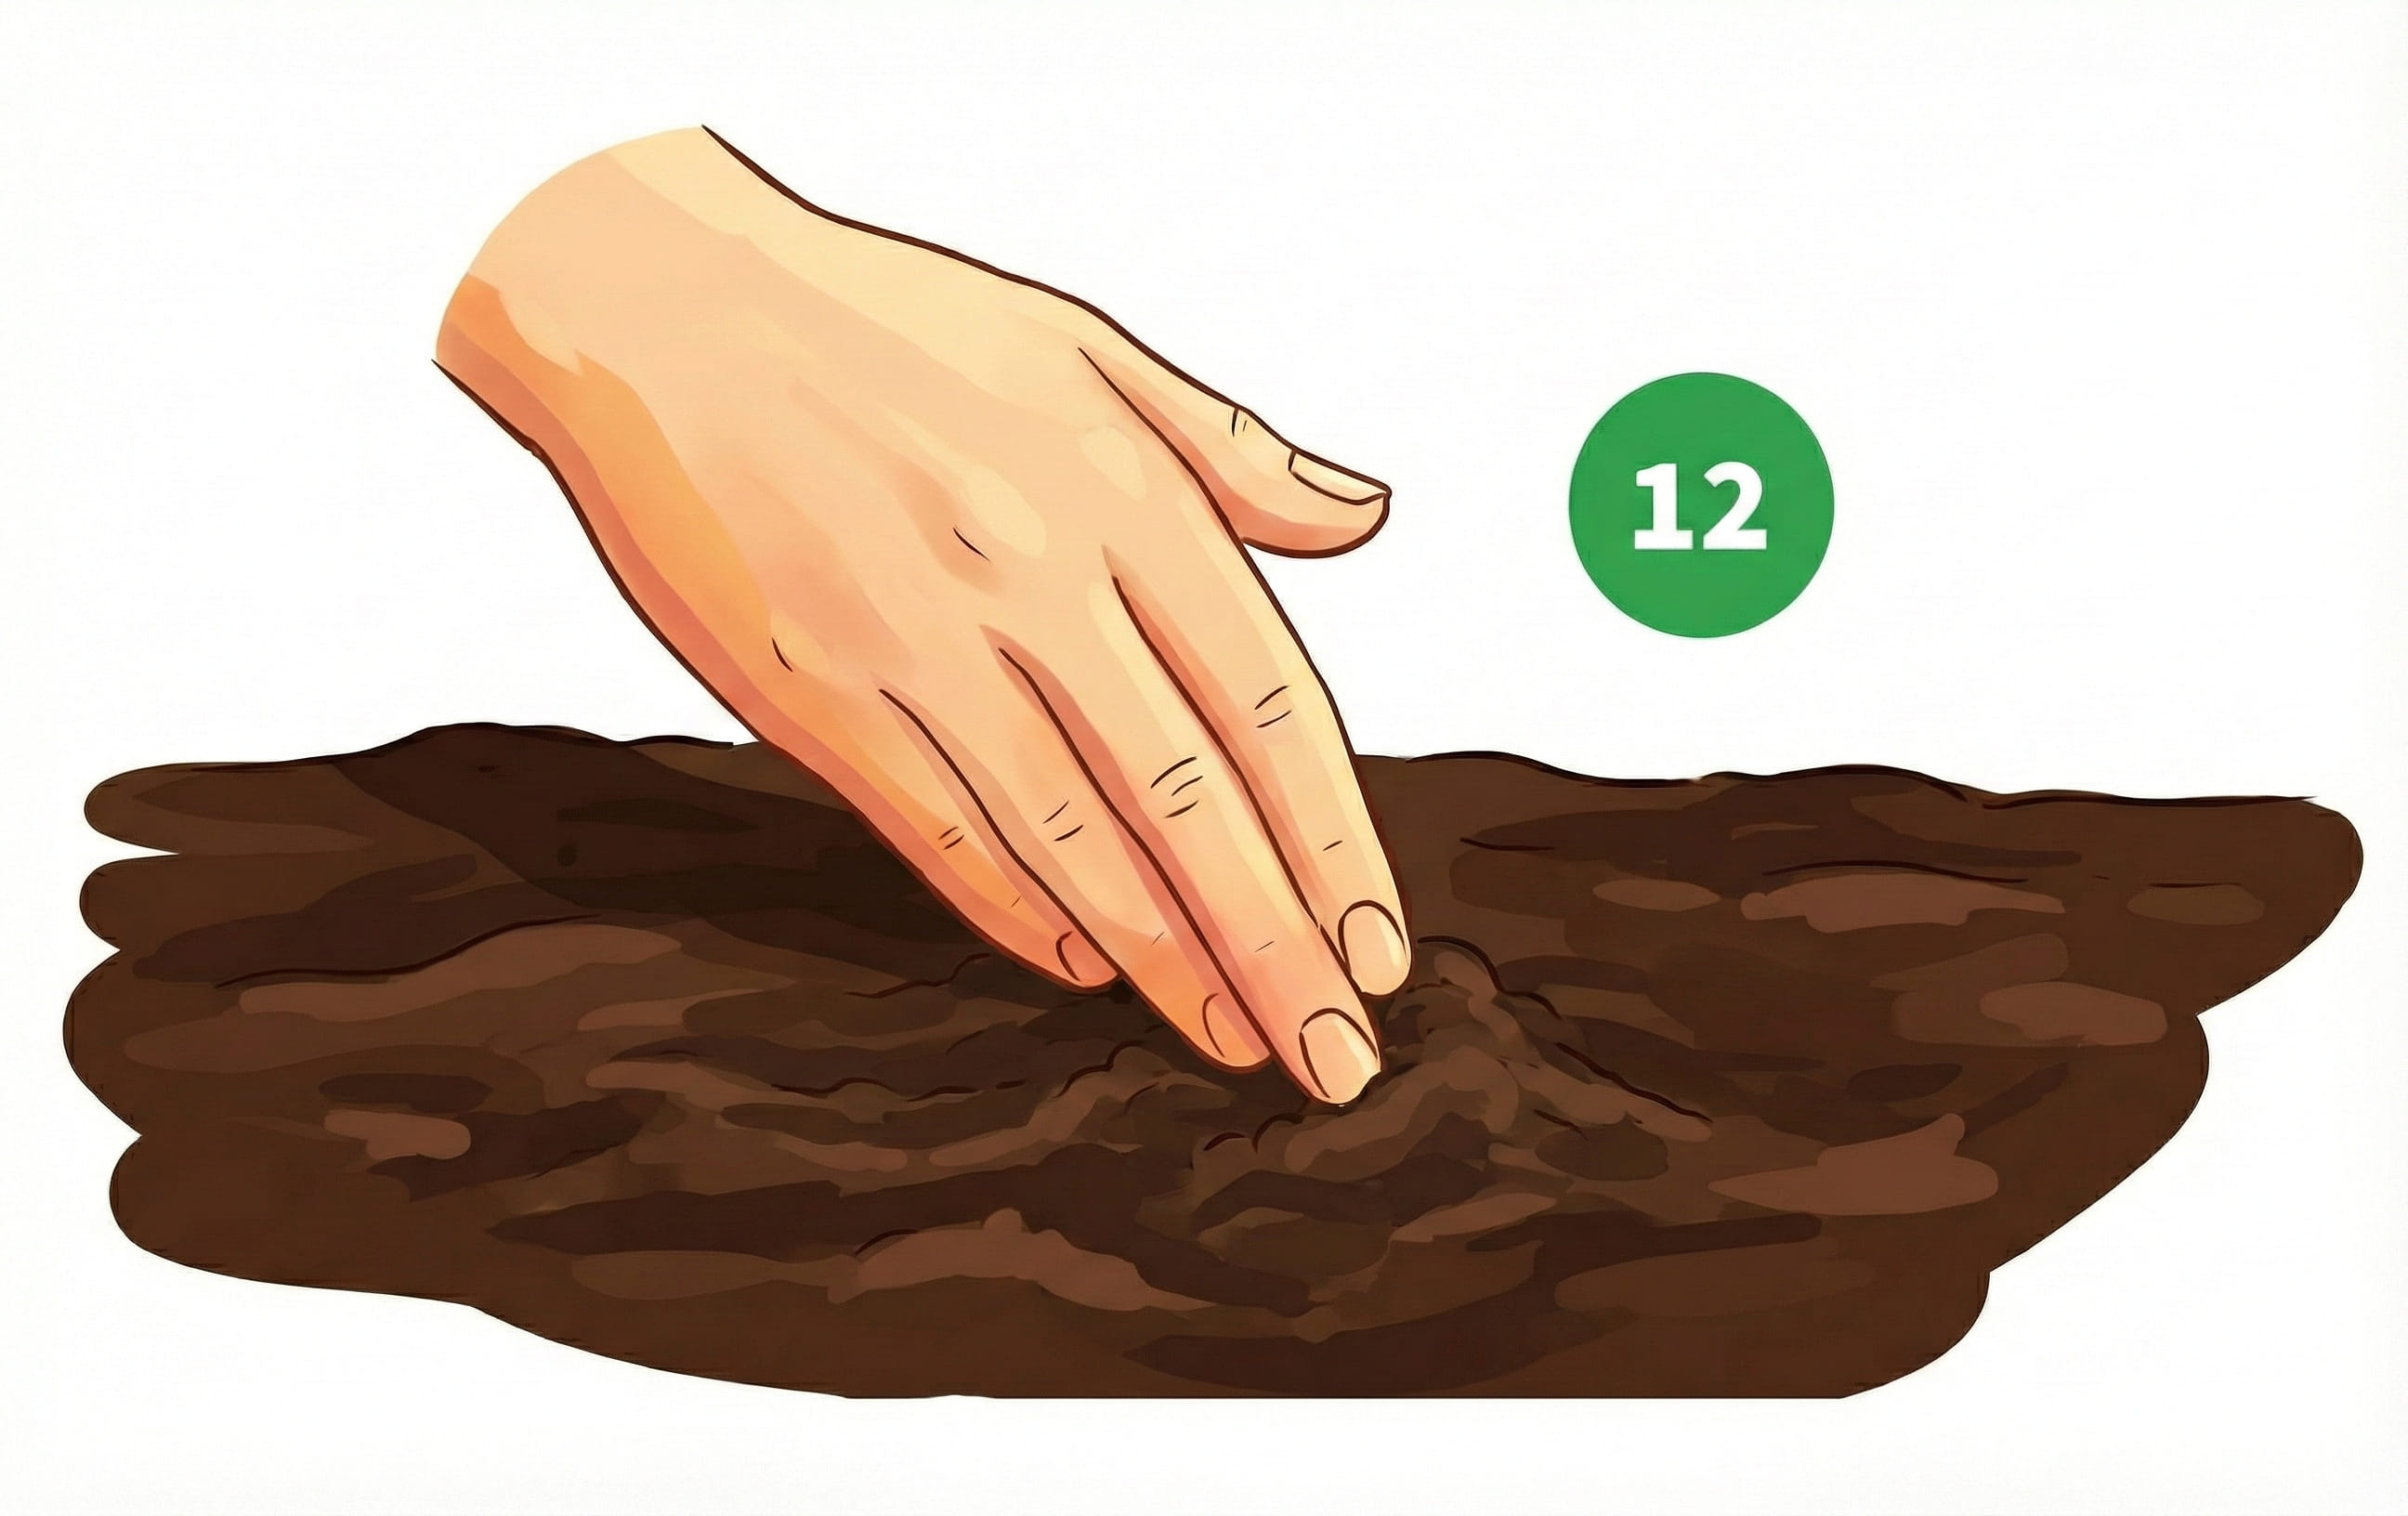
- Check the seeds every day. When they have developed a tap-root of about 1-3 cm (0.5 - 1 inch) you can move them into your medium.
- Because the seeds are hung vertically, the root grows straight downwards independent of the position of the seeds.

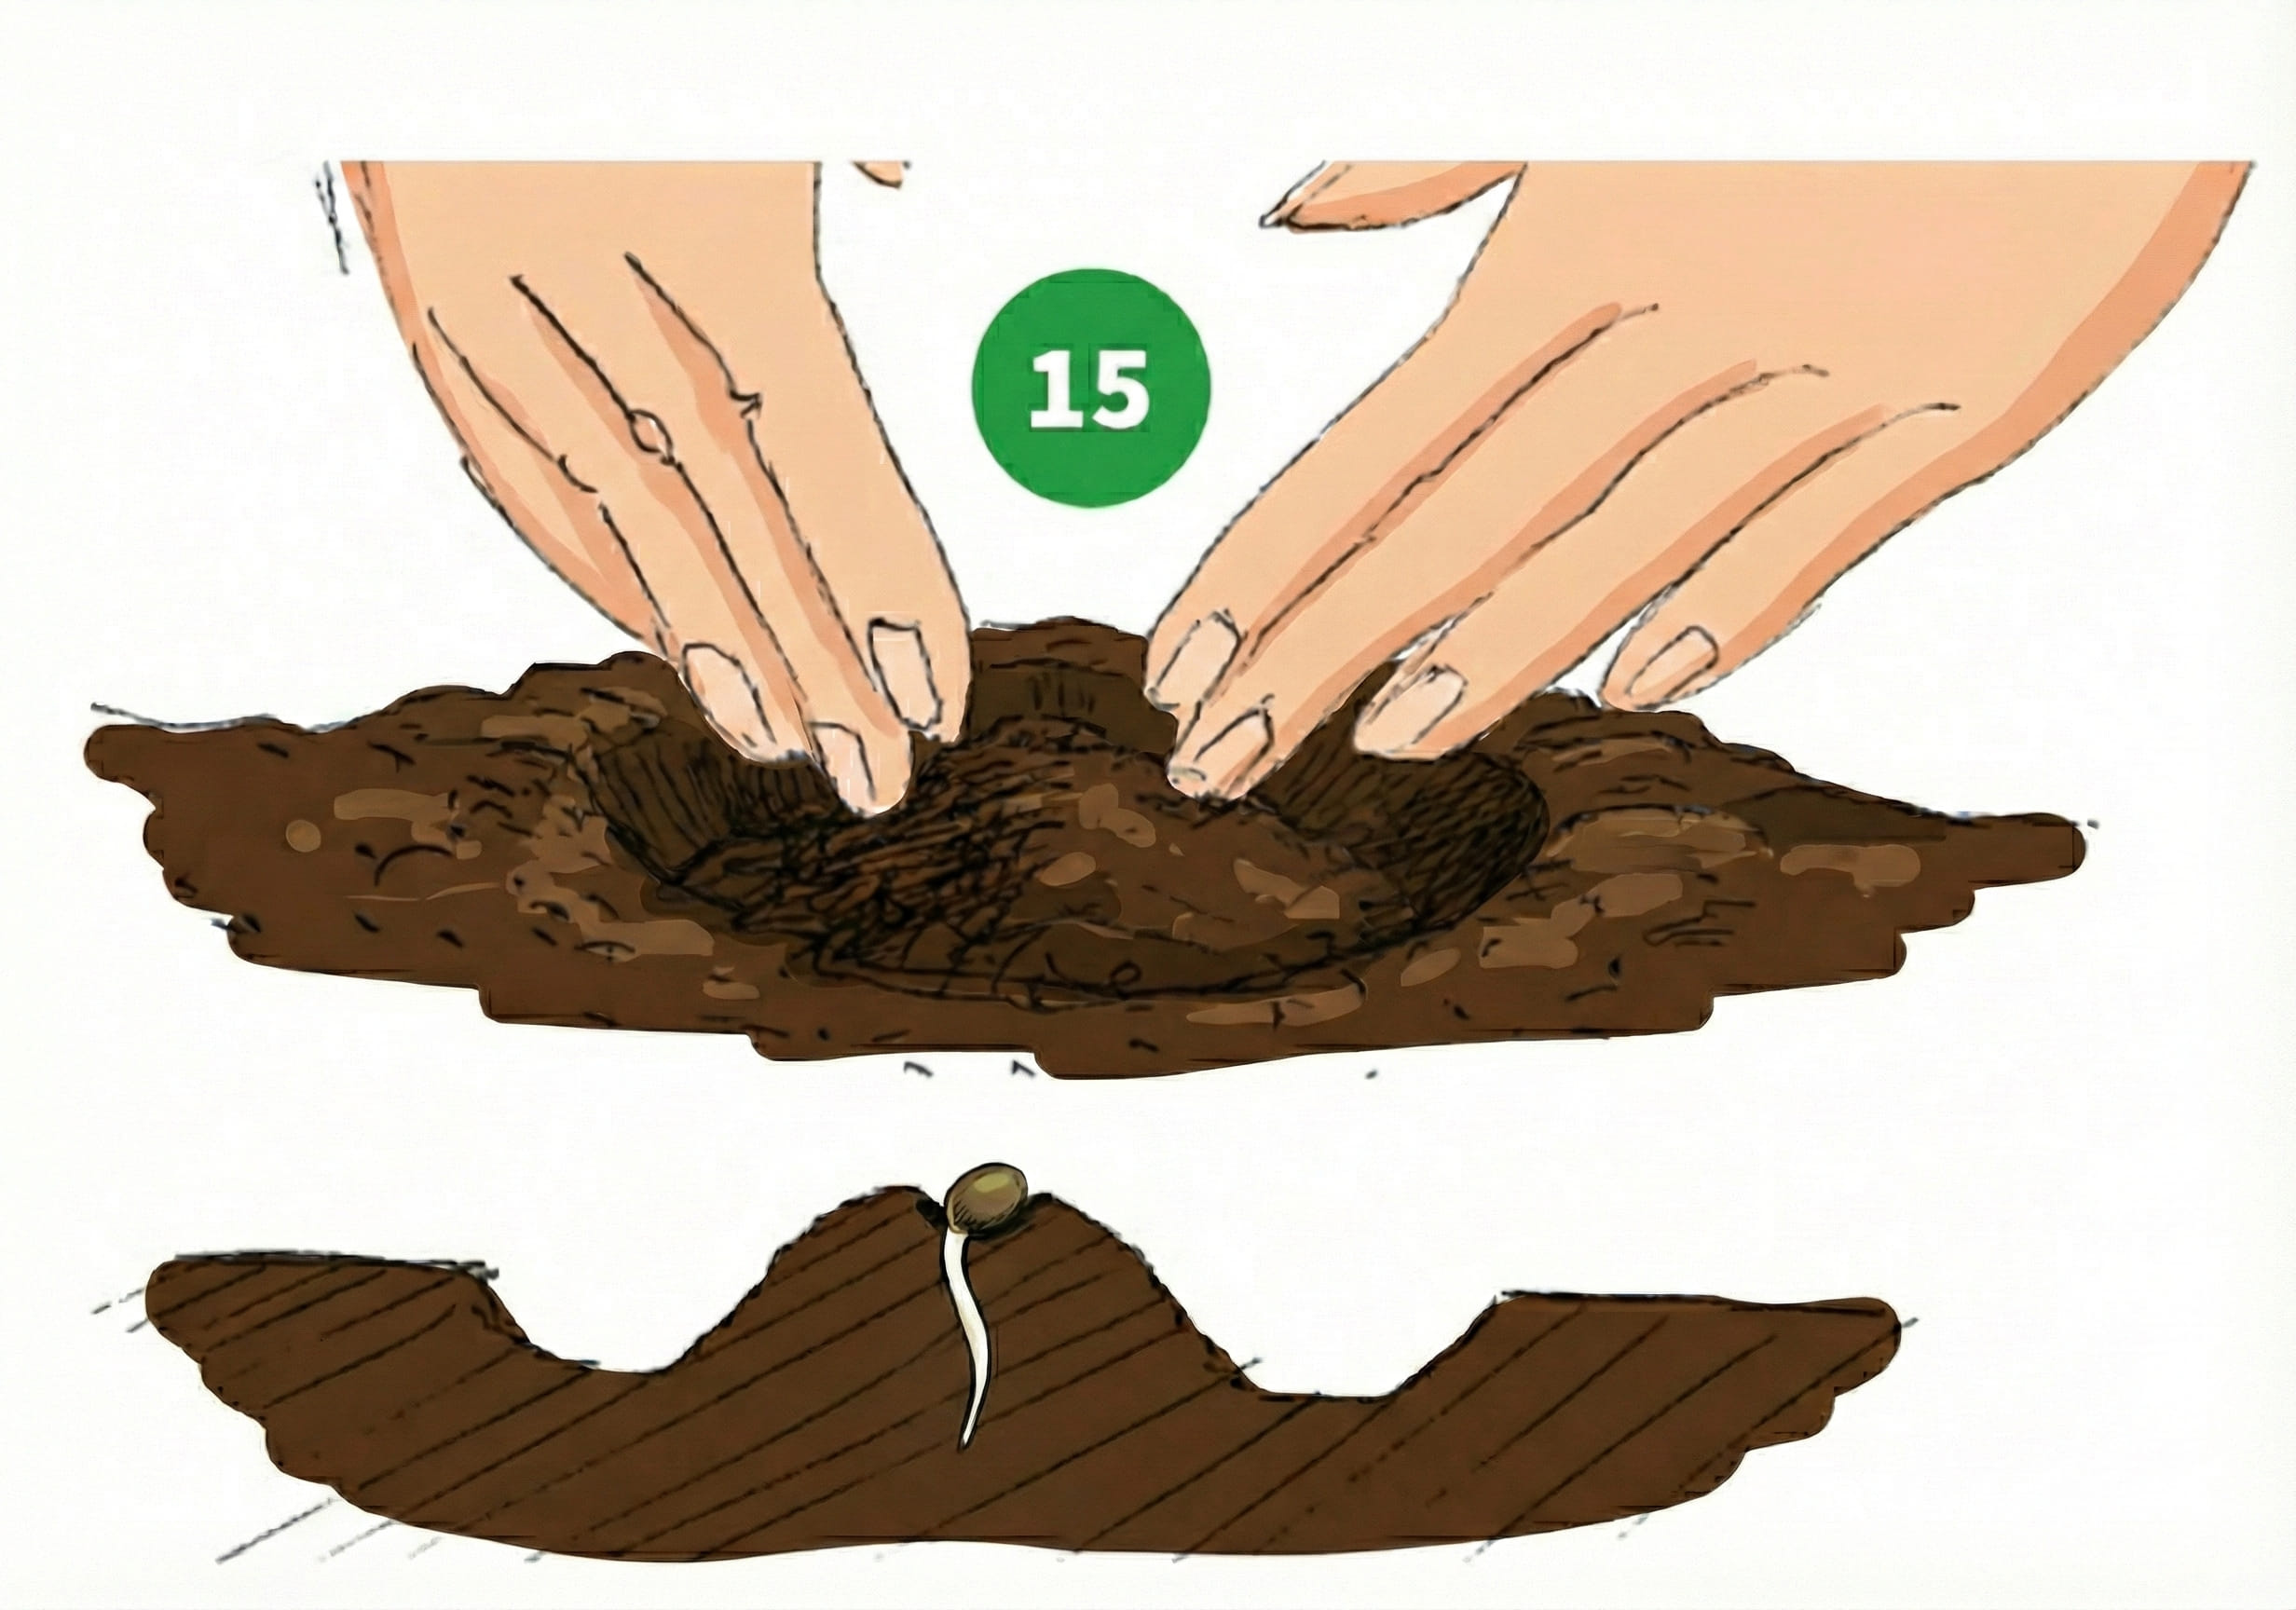
- Before planting a seed, prepare a pot. Fill it with good soil. Press it gently into the pot. Then add water to the soil (this is for the first week).
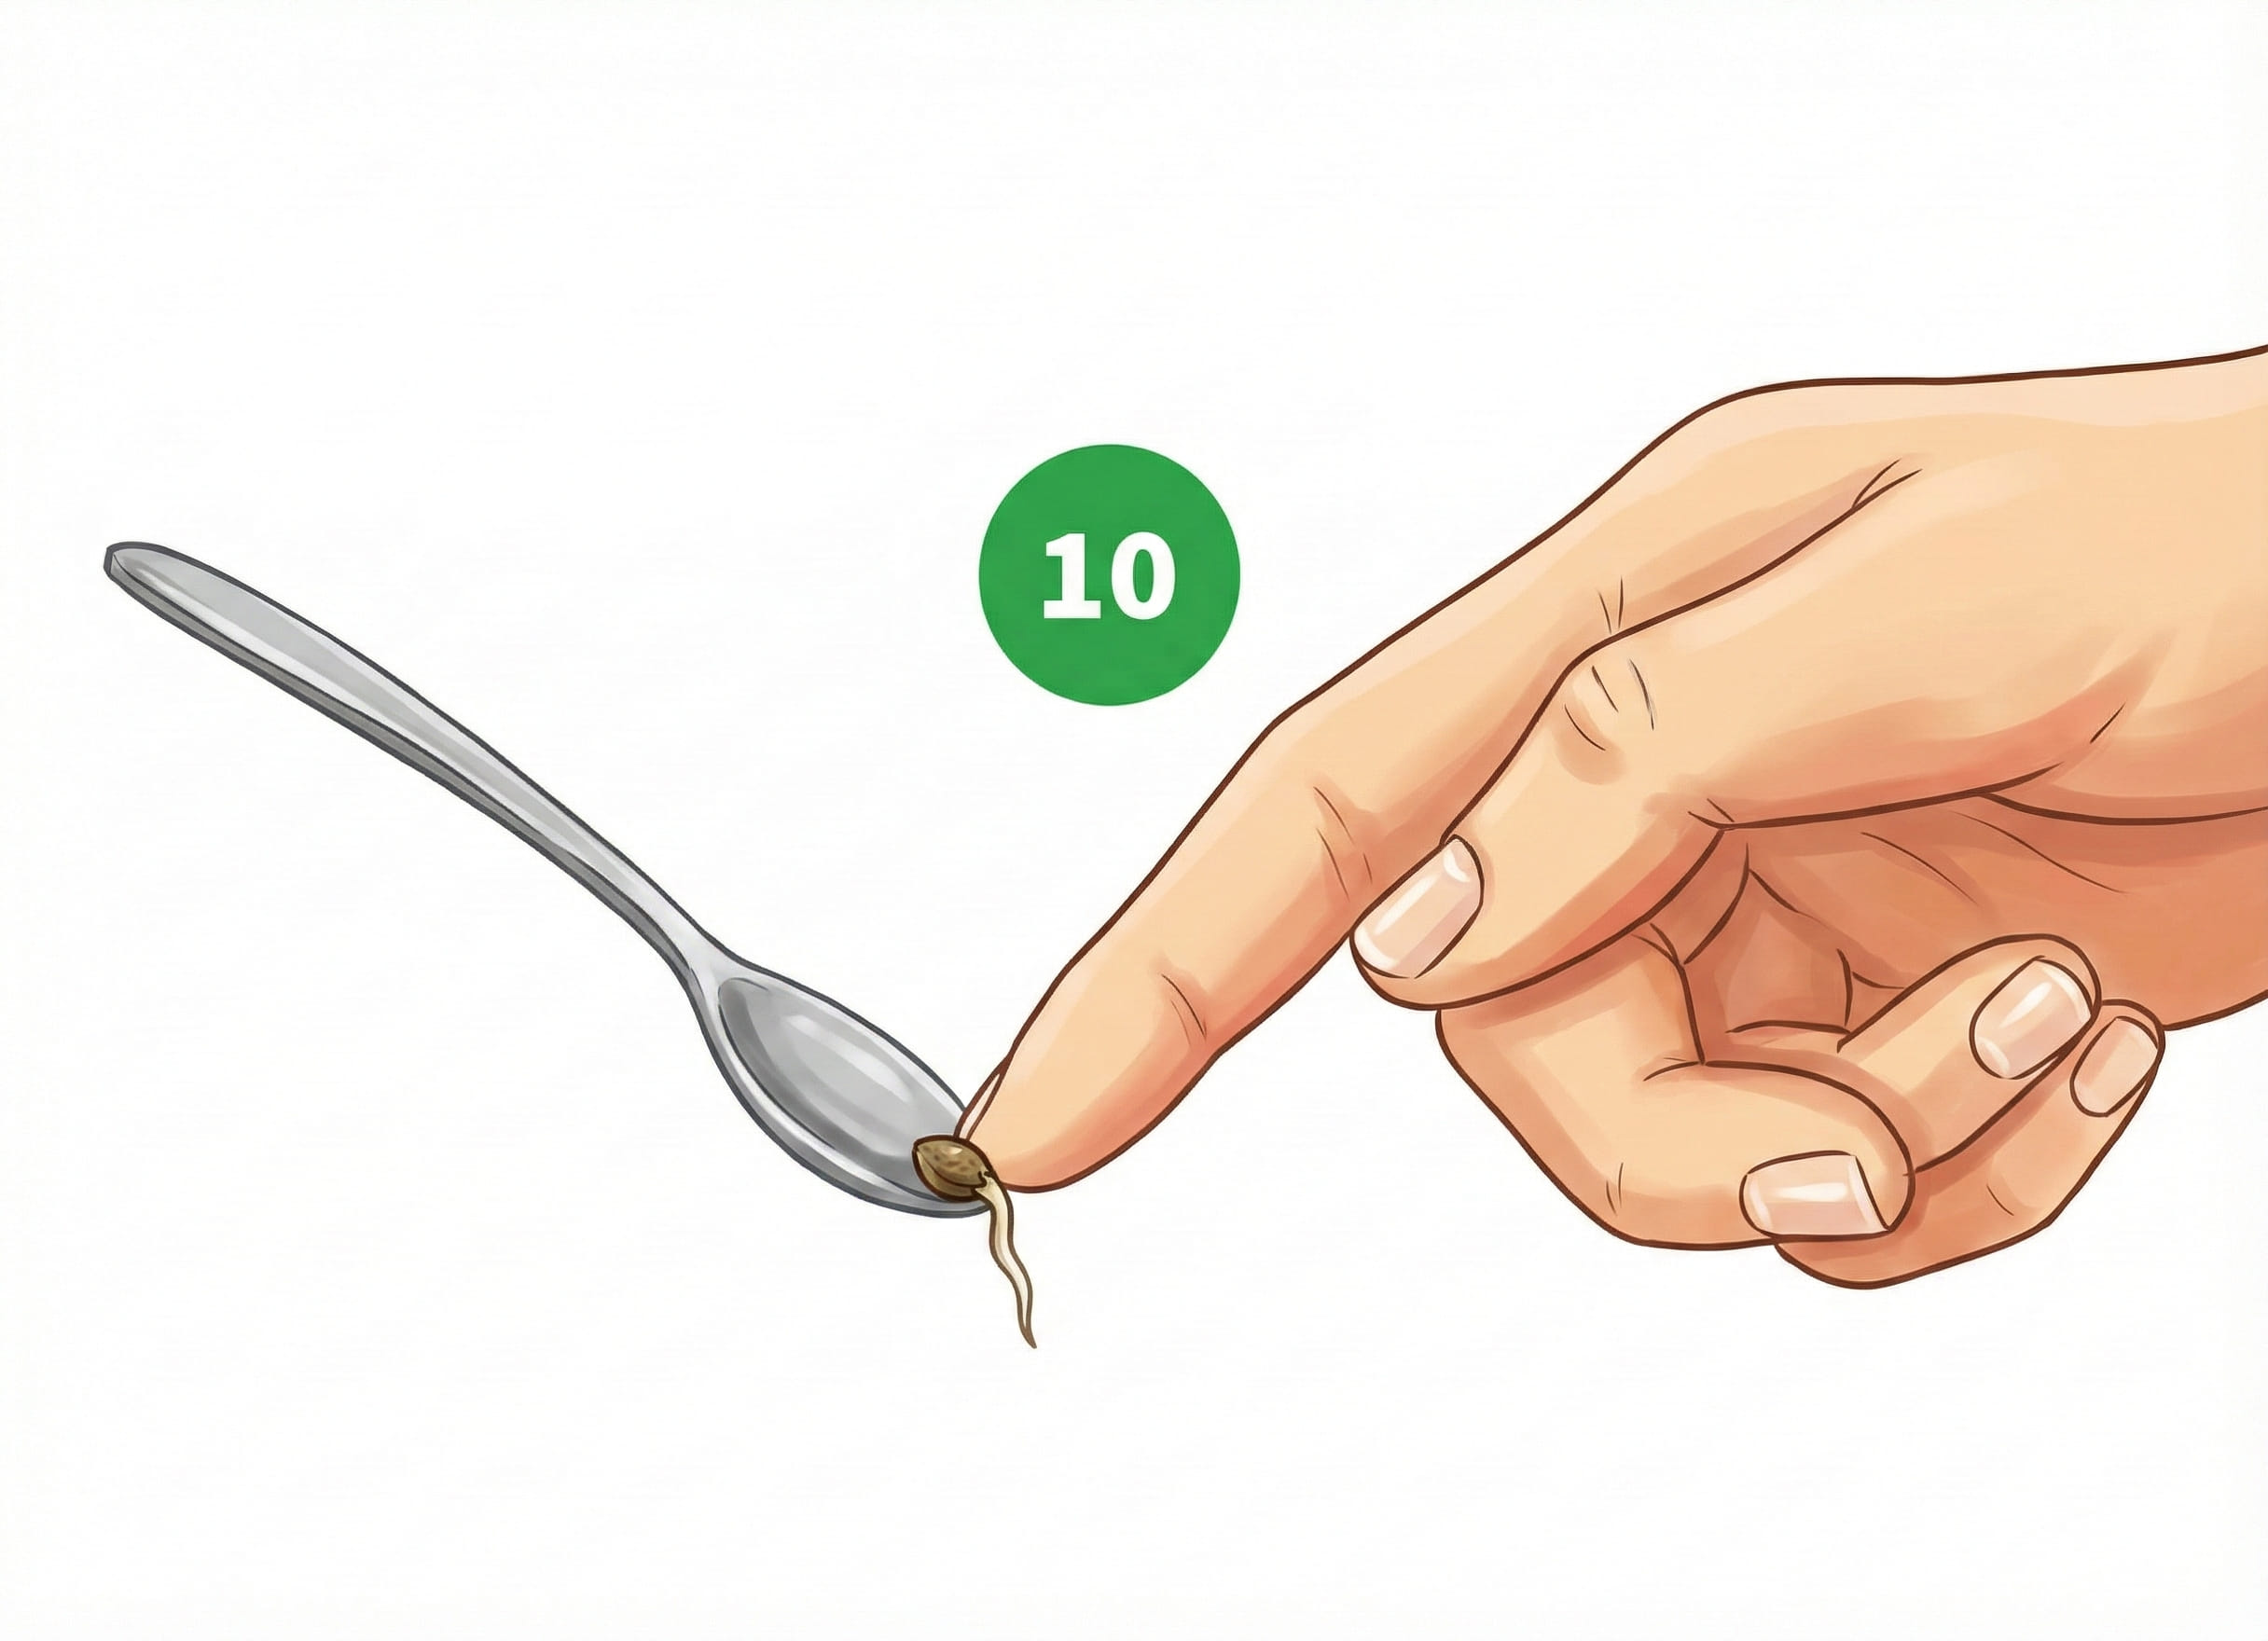
- In order to move a seed you can place it carefully onto a spoon with your finger.

- Make a hole in the soil, much bigger than the seed. Place the seed ON THE EDGE OF THE HOLE with the root pointing straight down. Make sure the root is pointing straight down and the seed is positioned on the edge. Do not bury the seed!
- Gently fill the hole with soil.
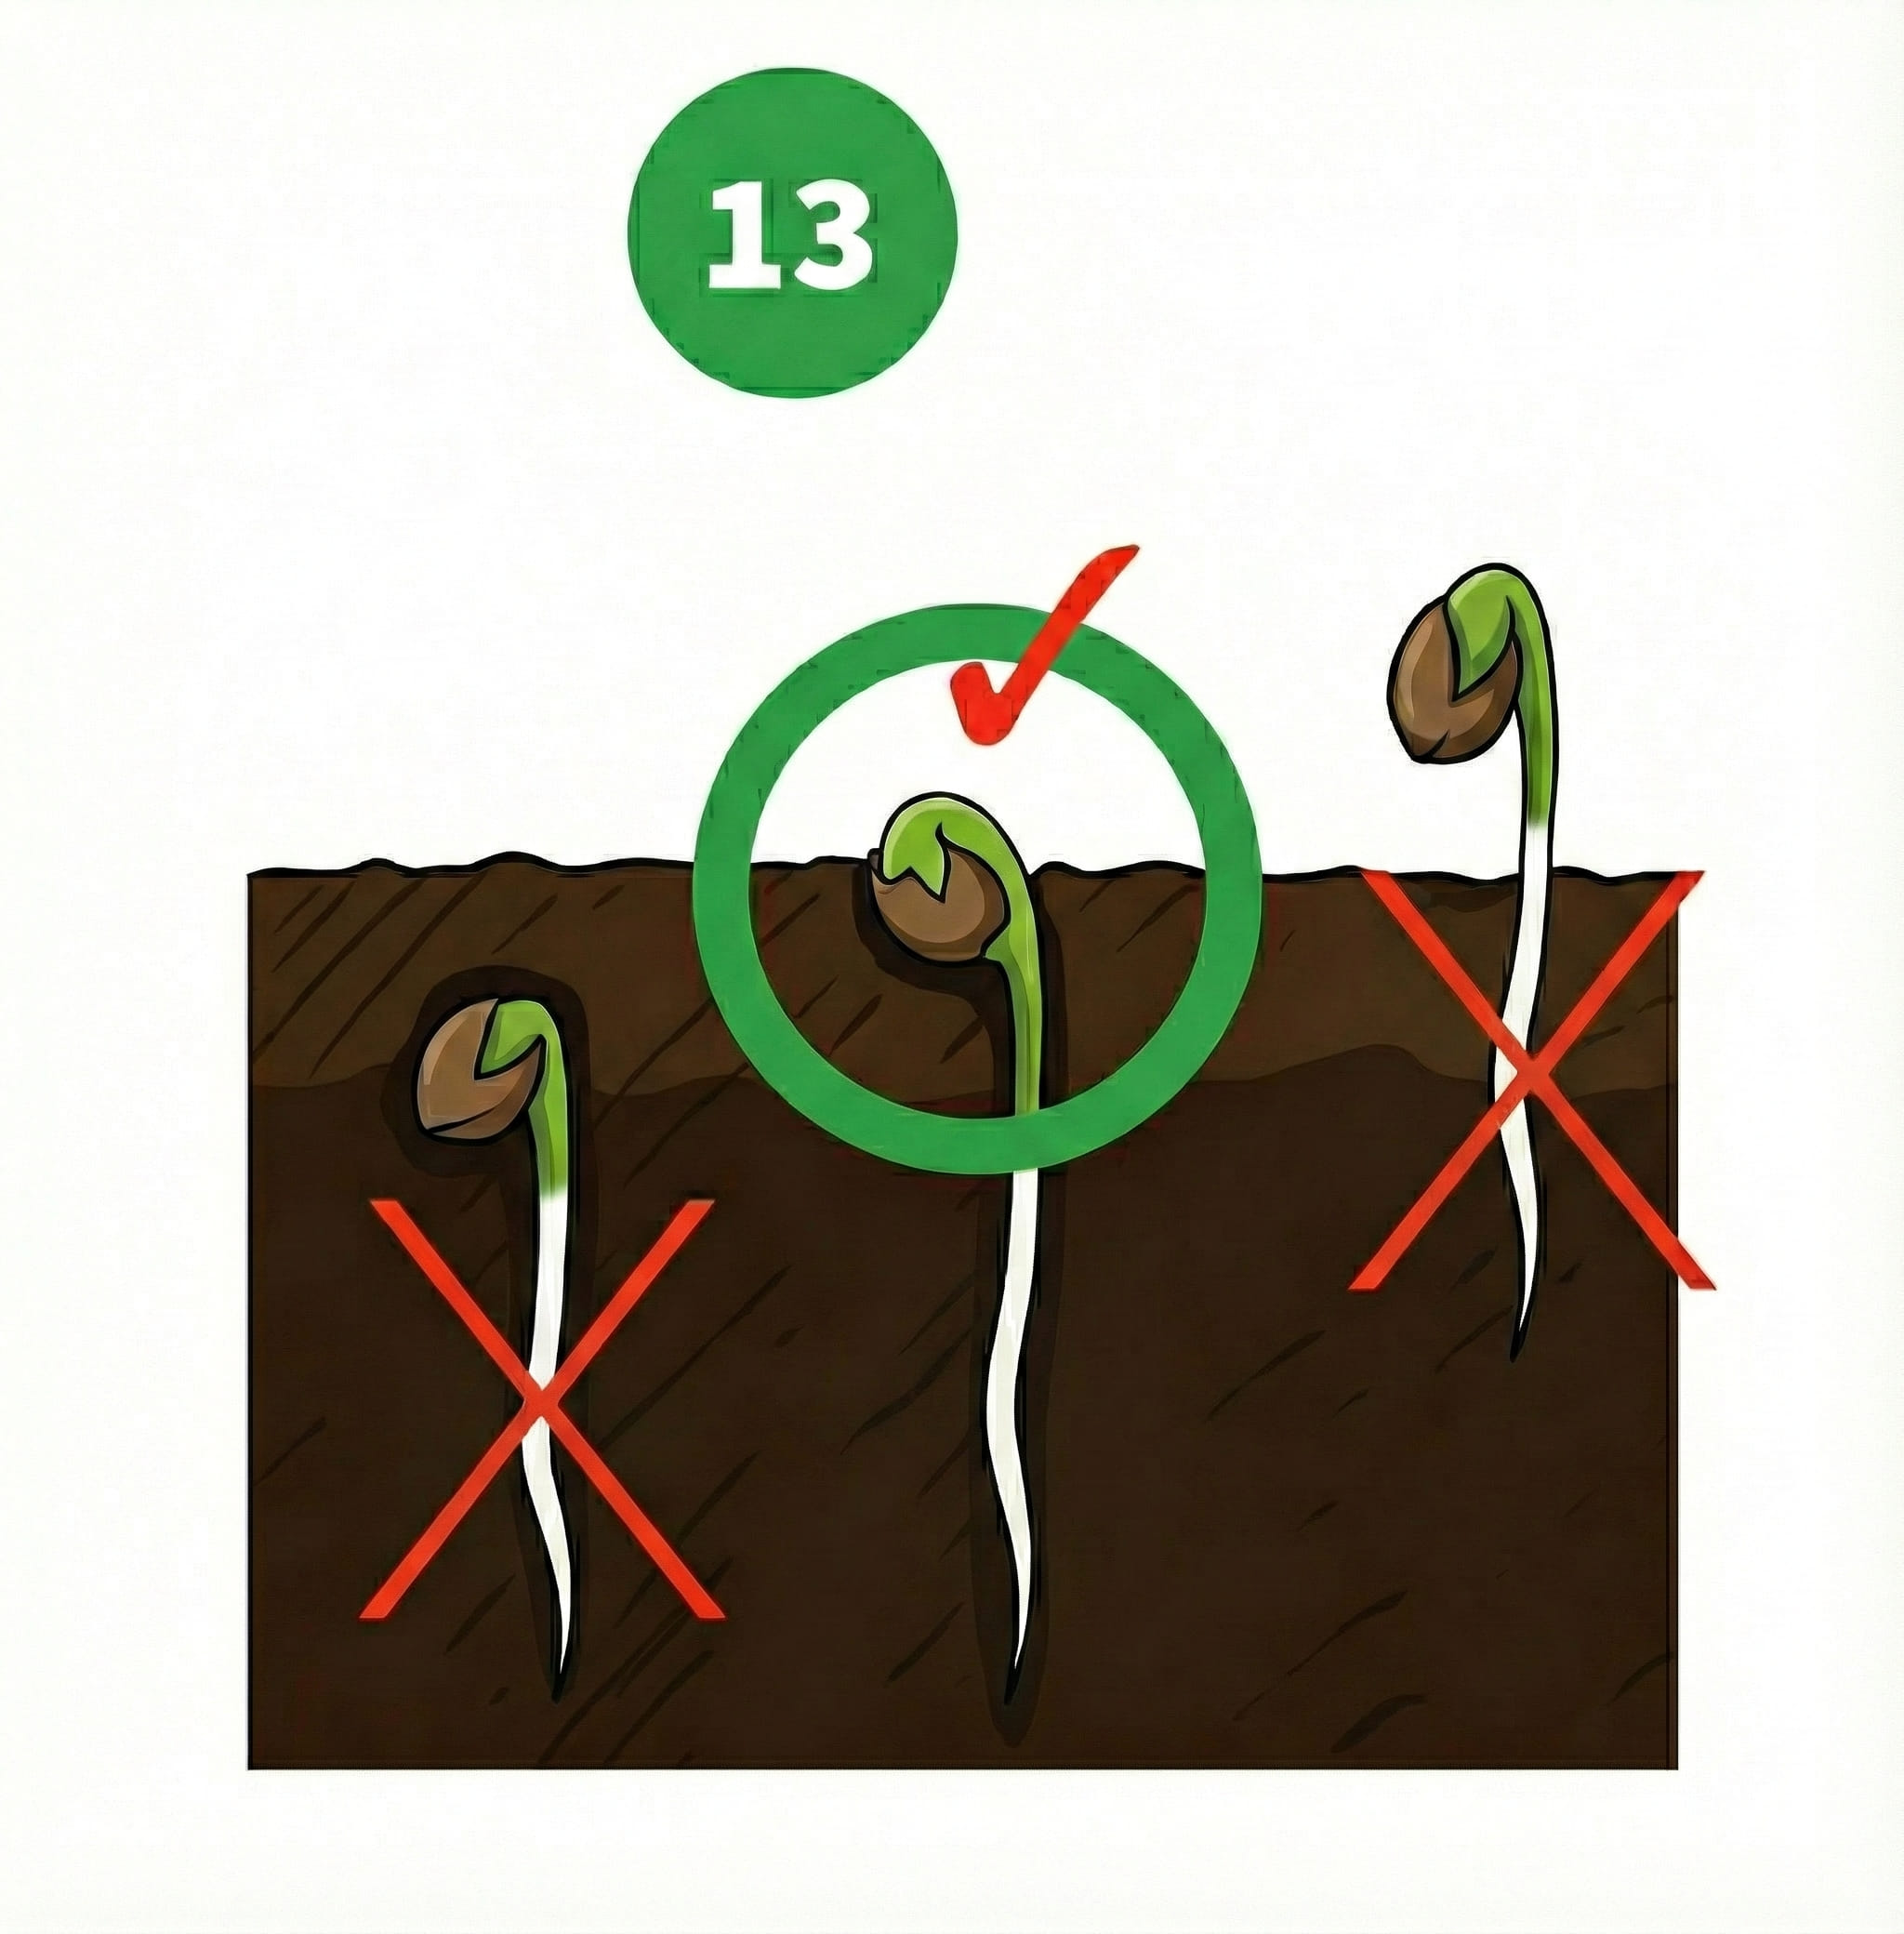
- After filling the hole with soil the seed should be positioned half in the soil and half on top of the soil. The seed should NOT be buried and NOT be elevated above the soil.
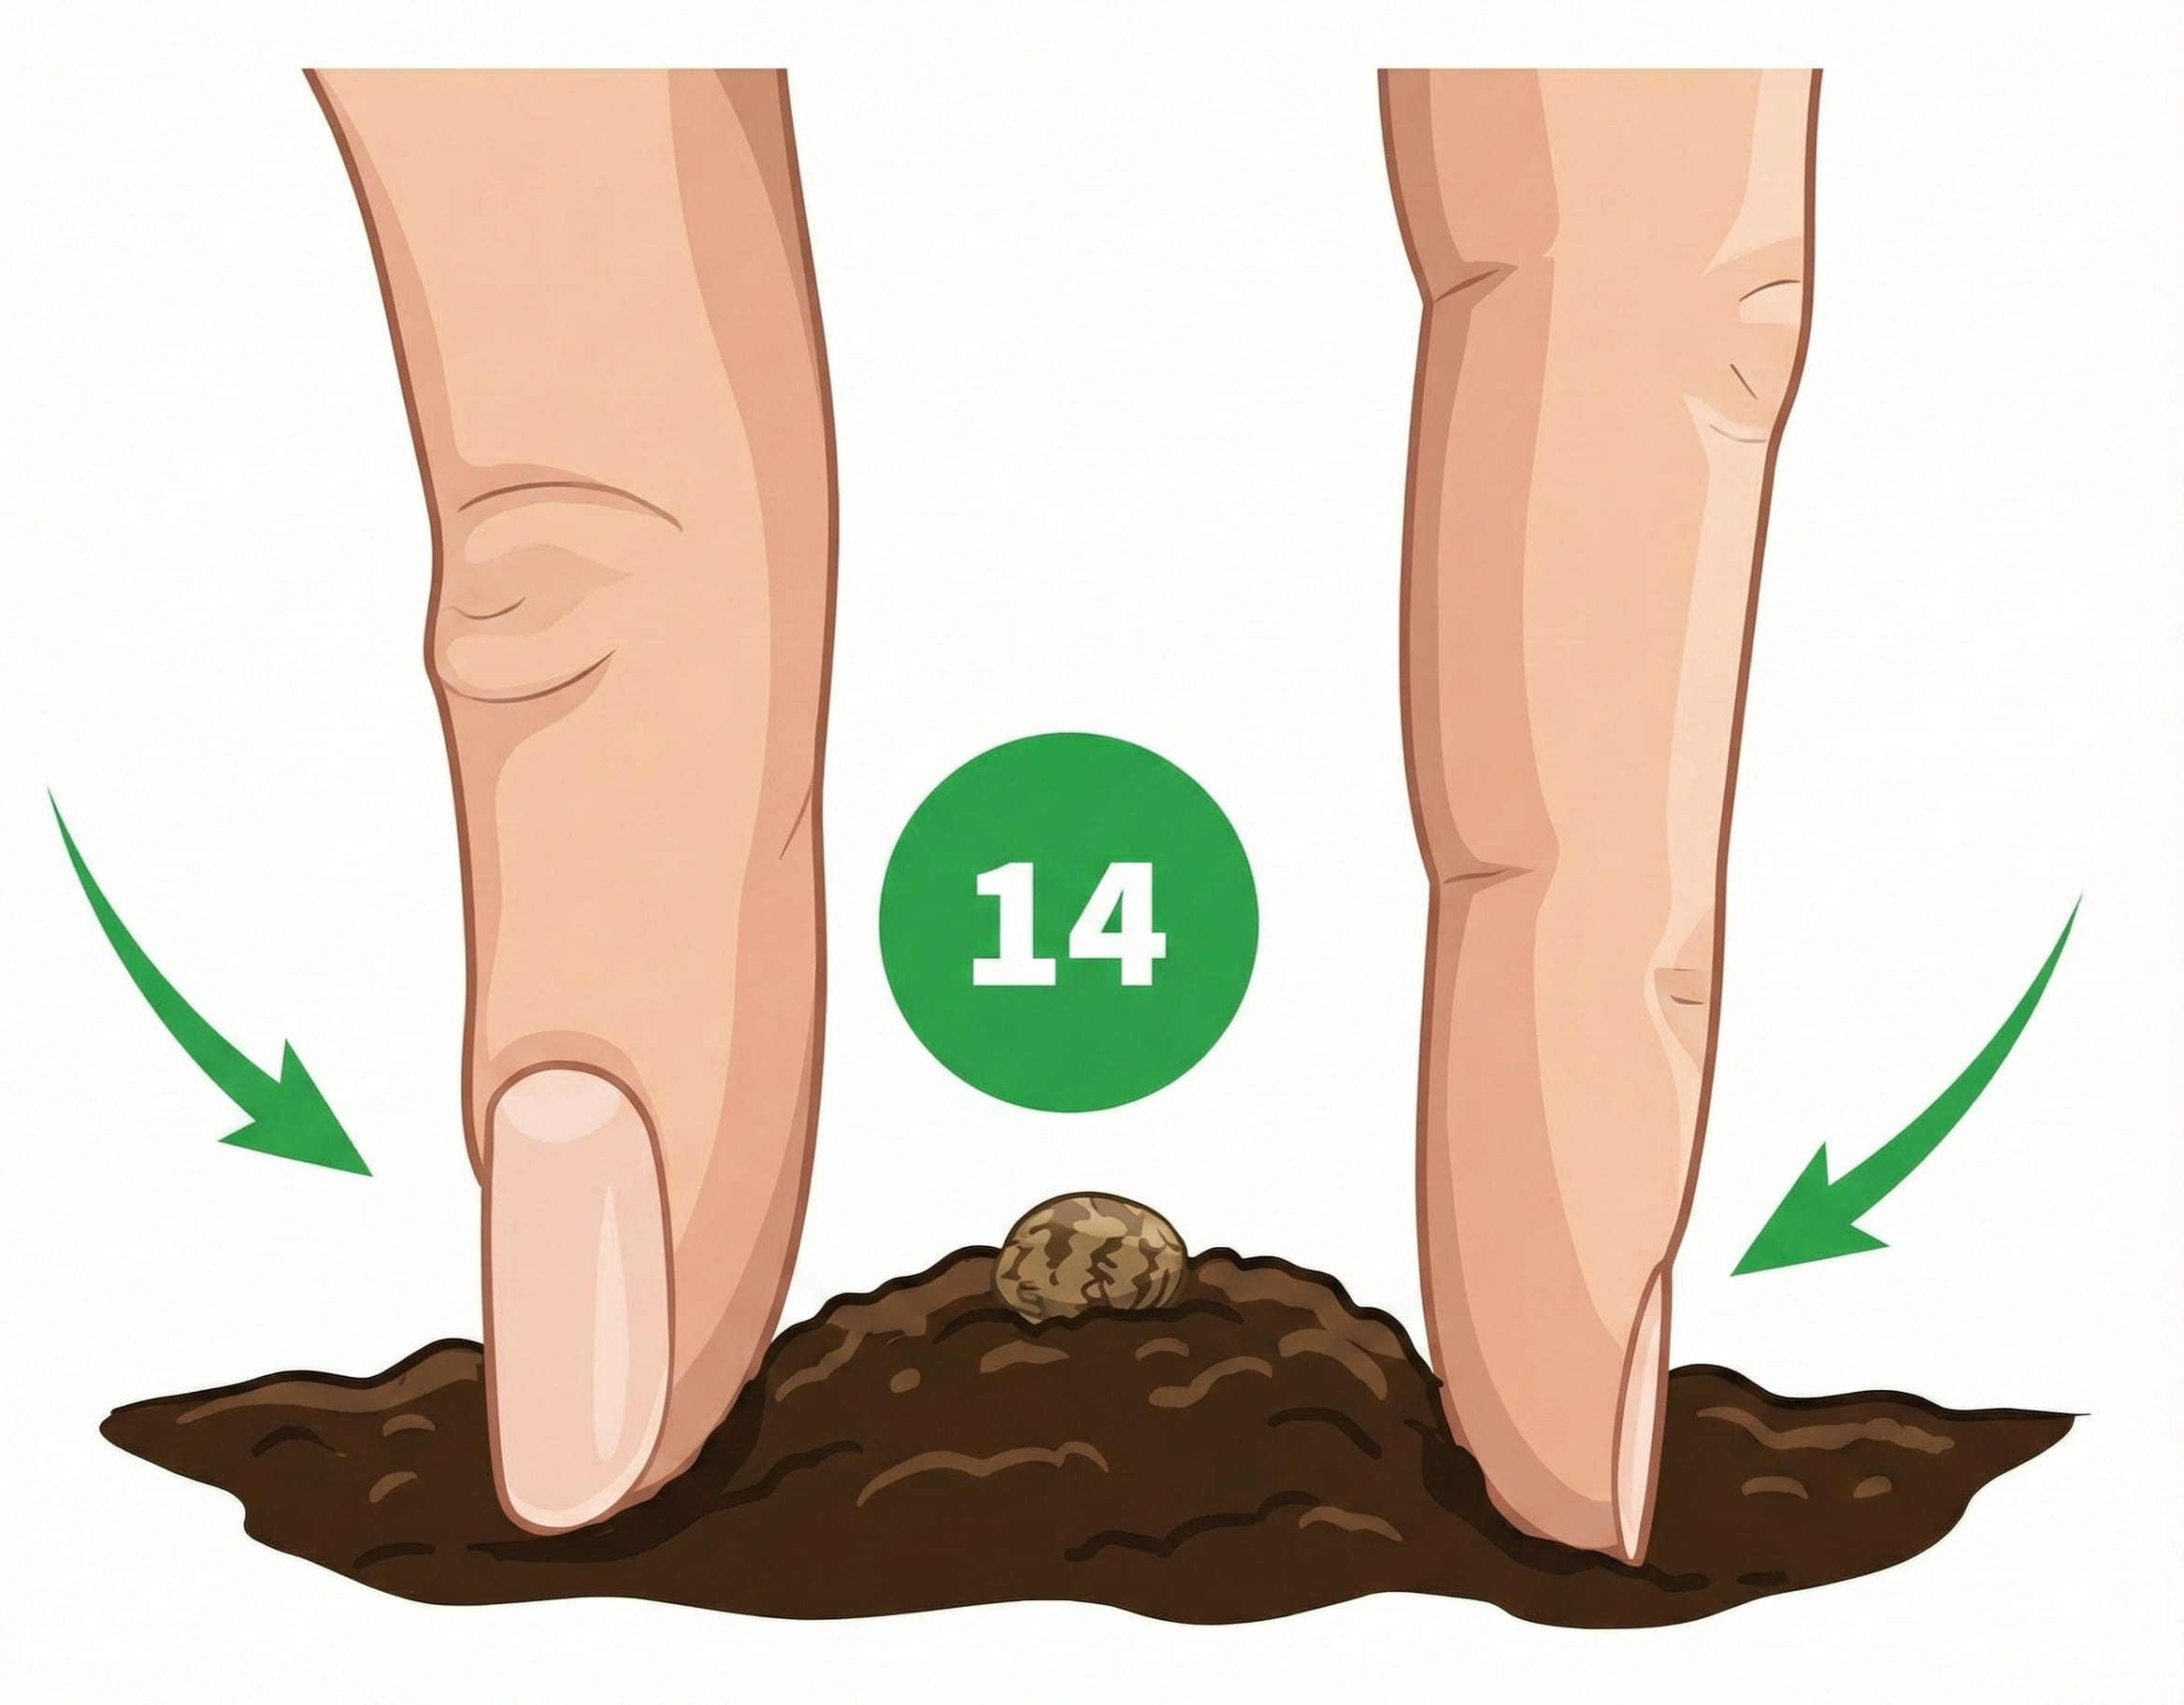
- Press the soil down around the seed, so that the seed is on top of a 'mountain'.
- Around the 'mountain' make a deep circle.
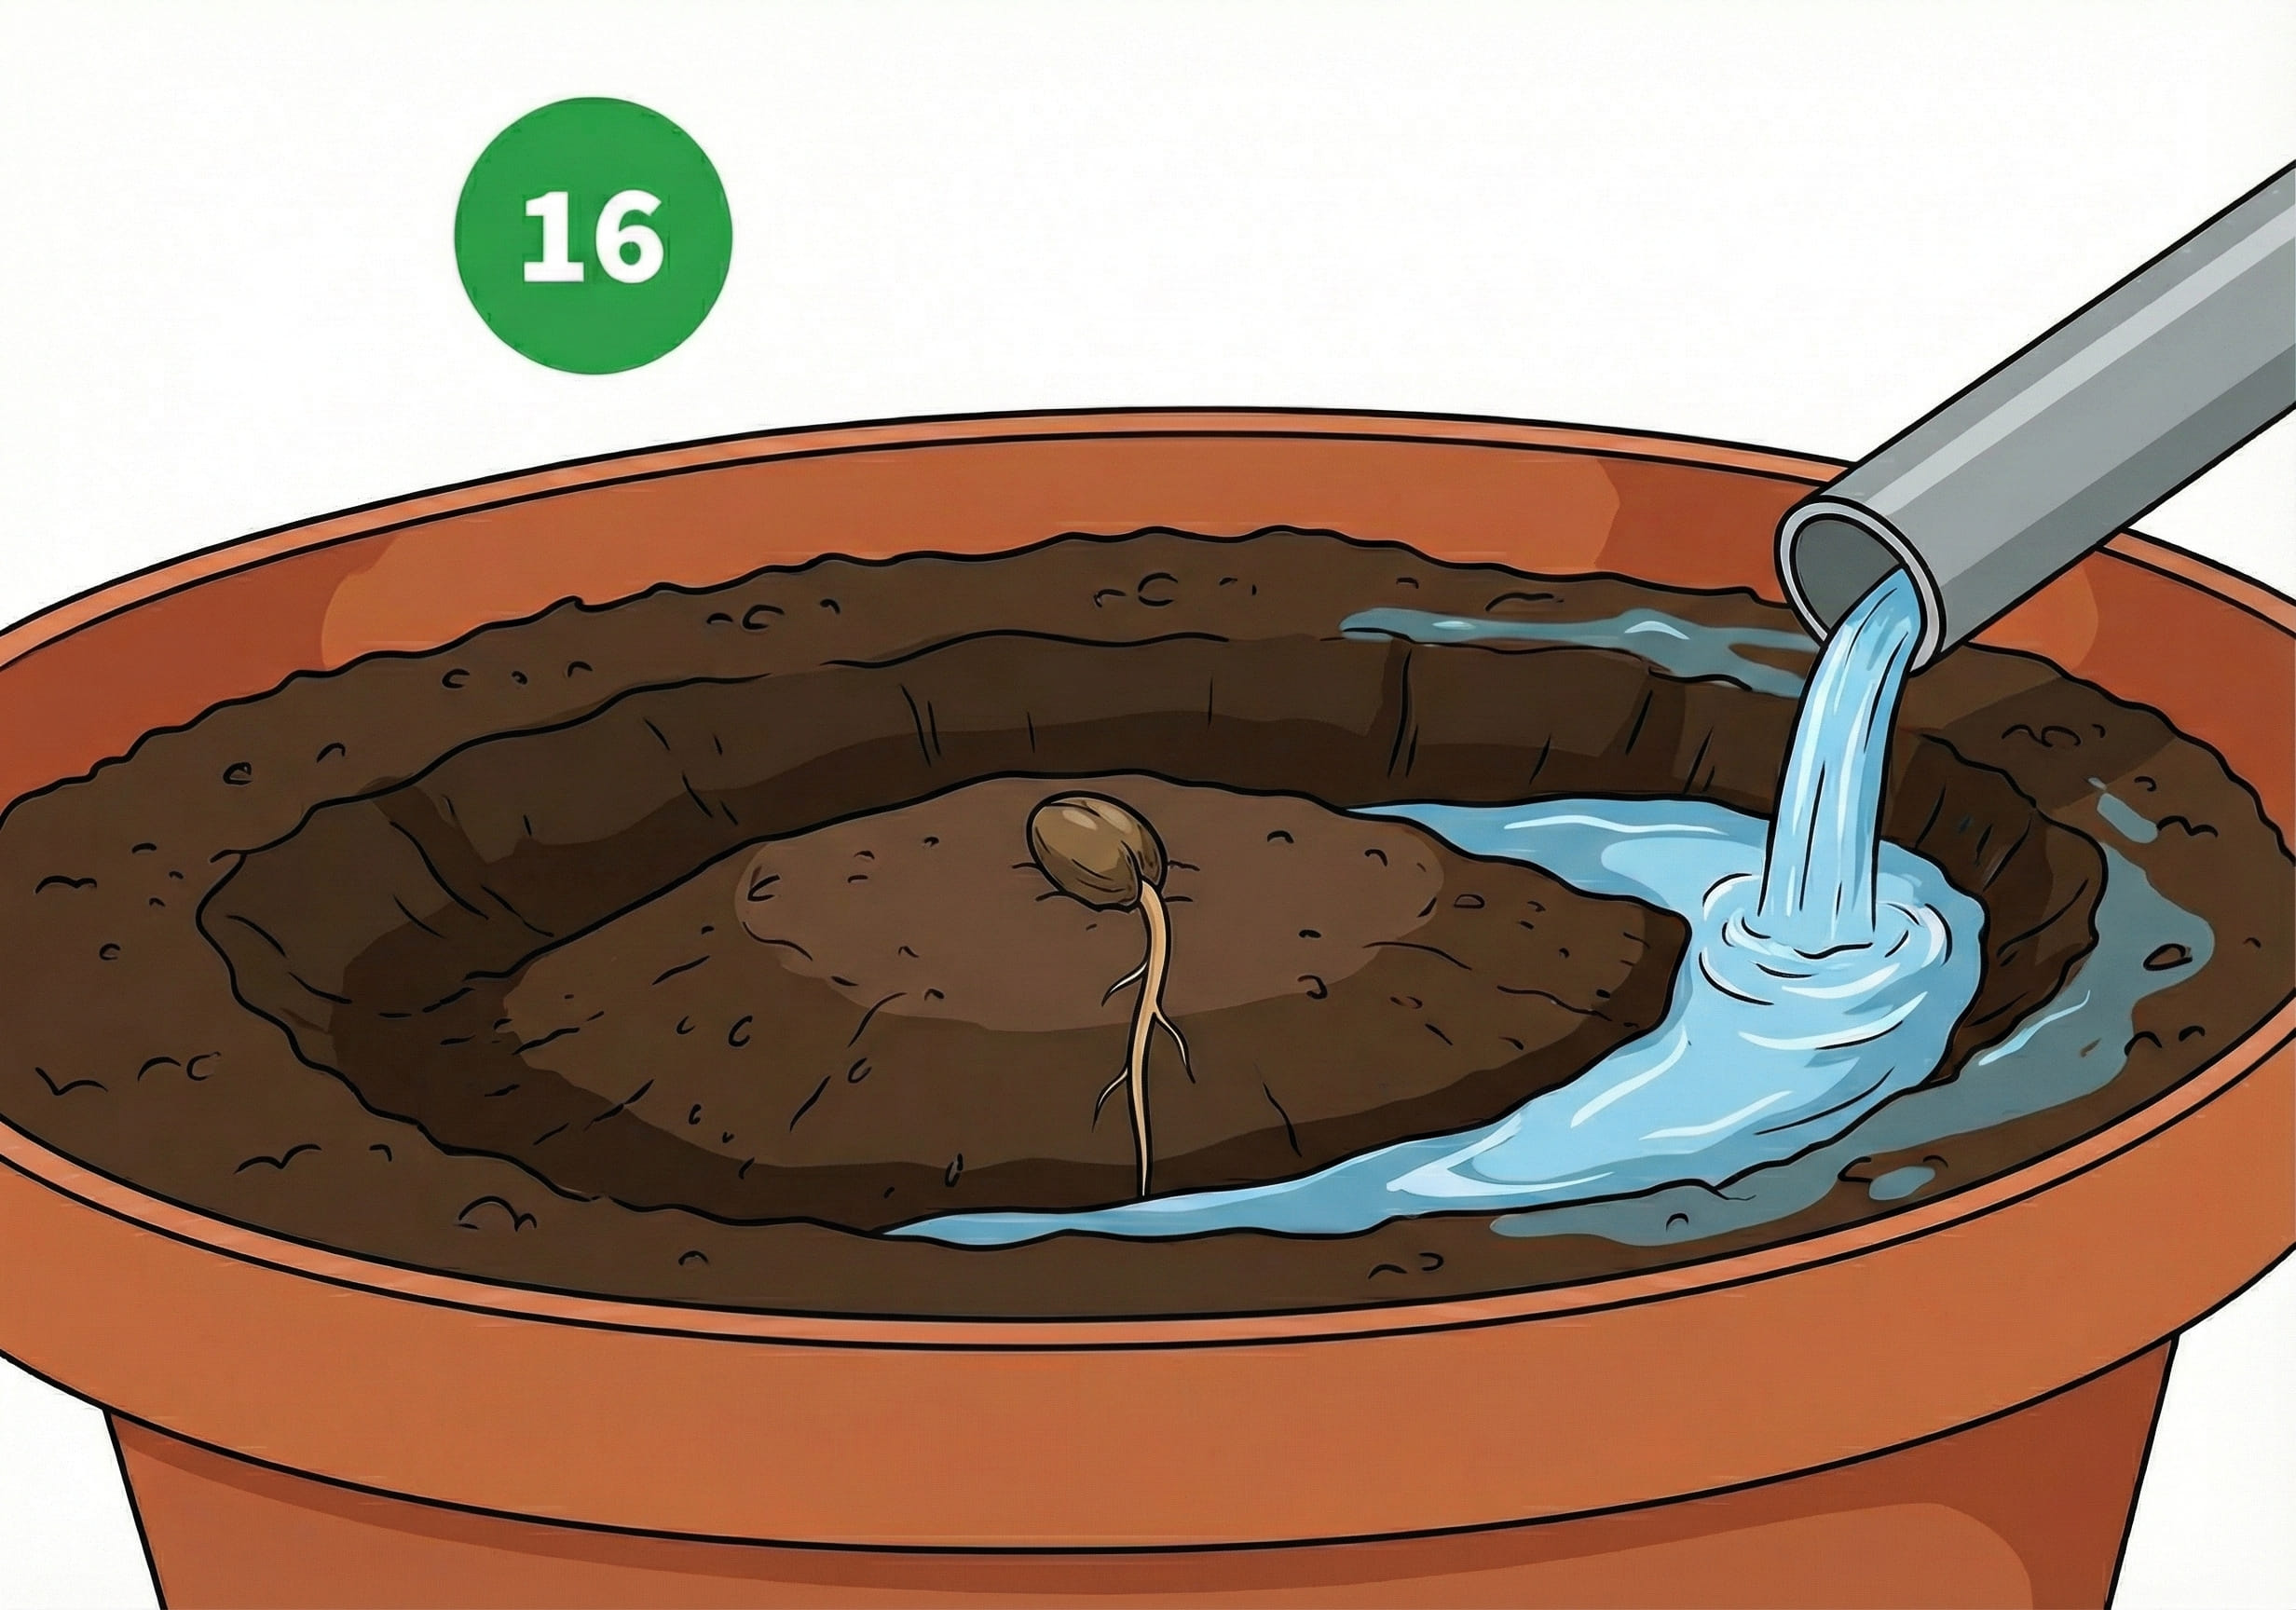
- If you give water in the circle the seed does not get wet, but the roots can take up water via the soil.
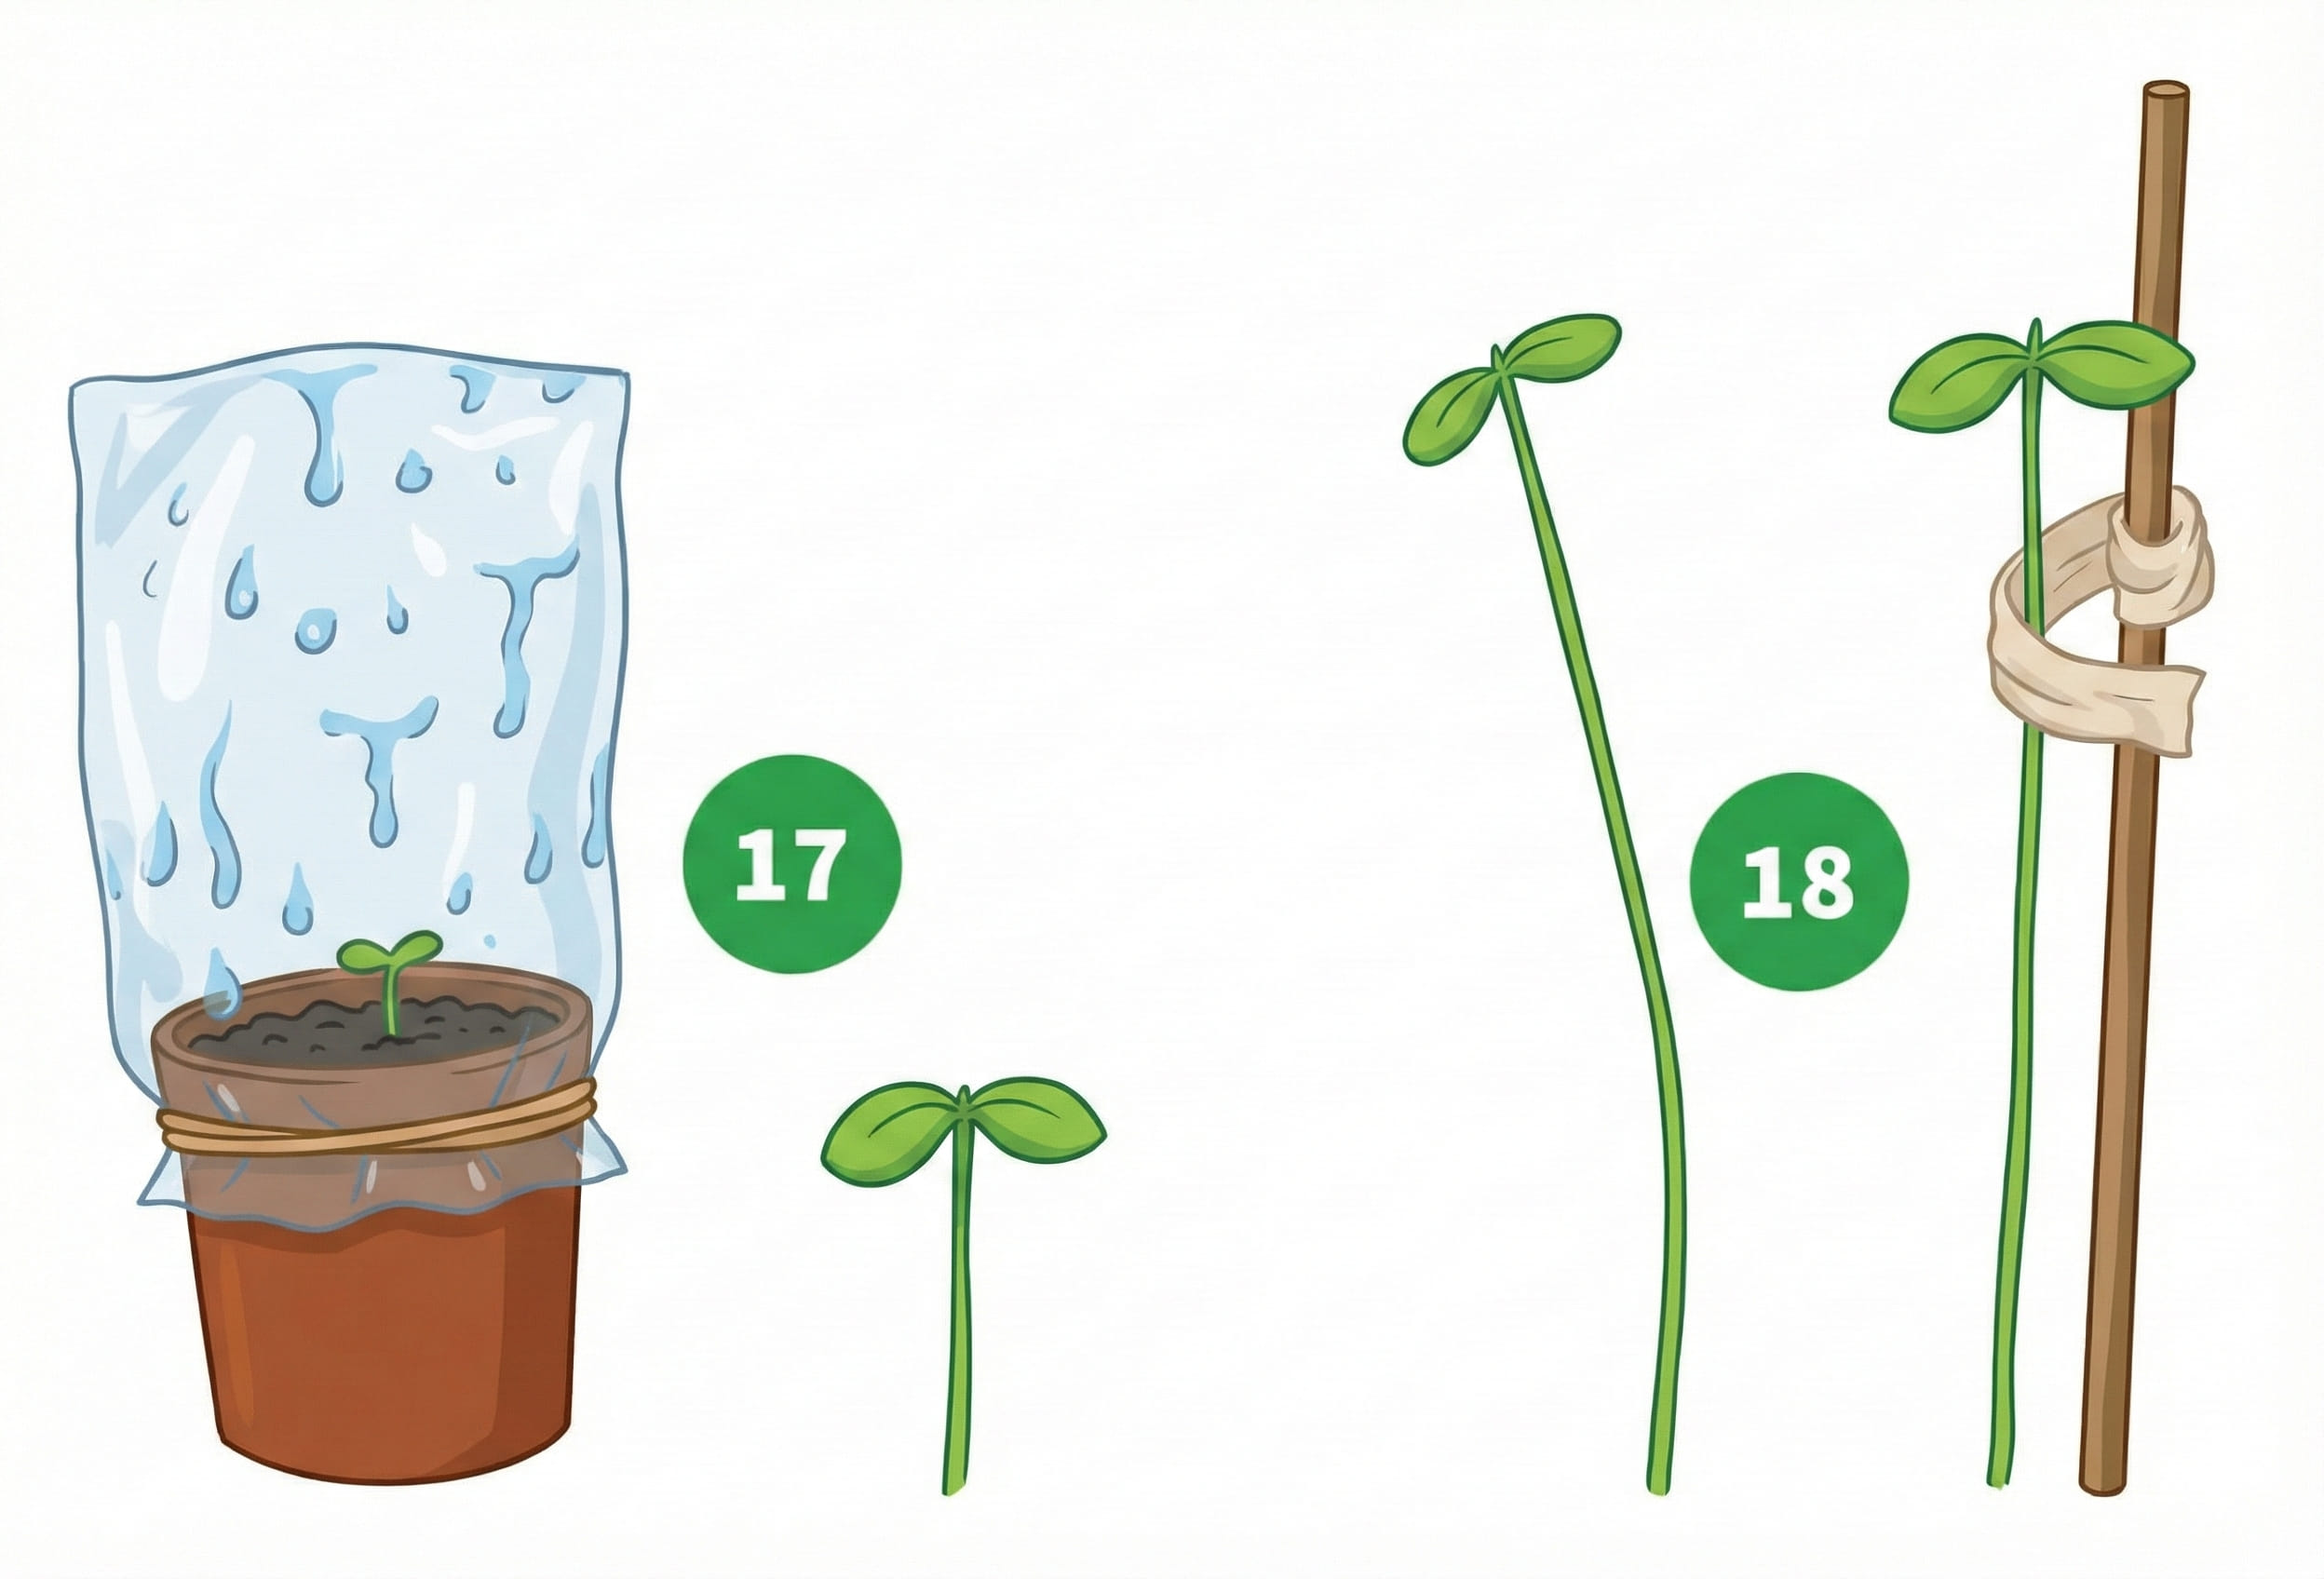
- Place a plastic bag over the pot to keep warmth and moisture inside for the first days.
- Not enough light will make the seedling stretch. If the seedling gets long and thin, support it with a stick so it does not break.
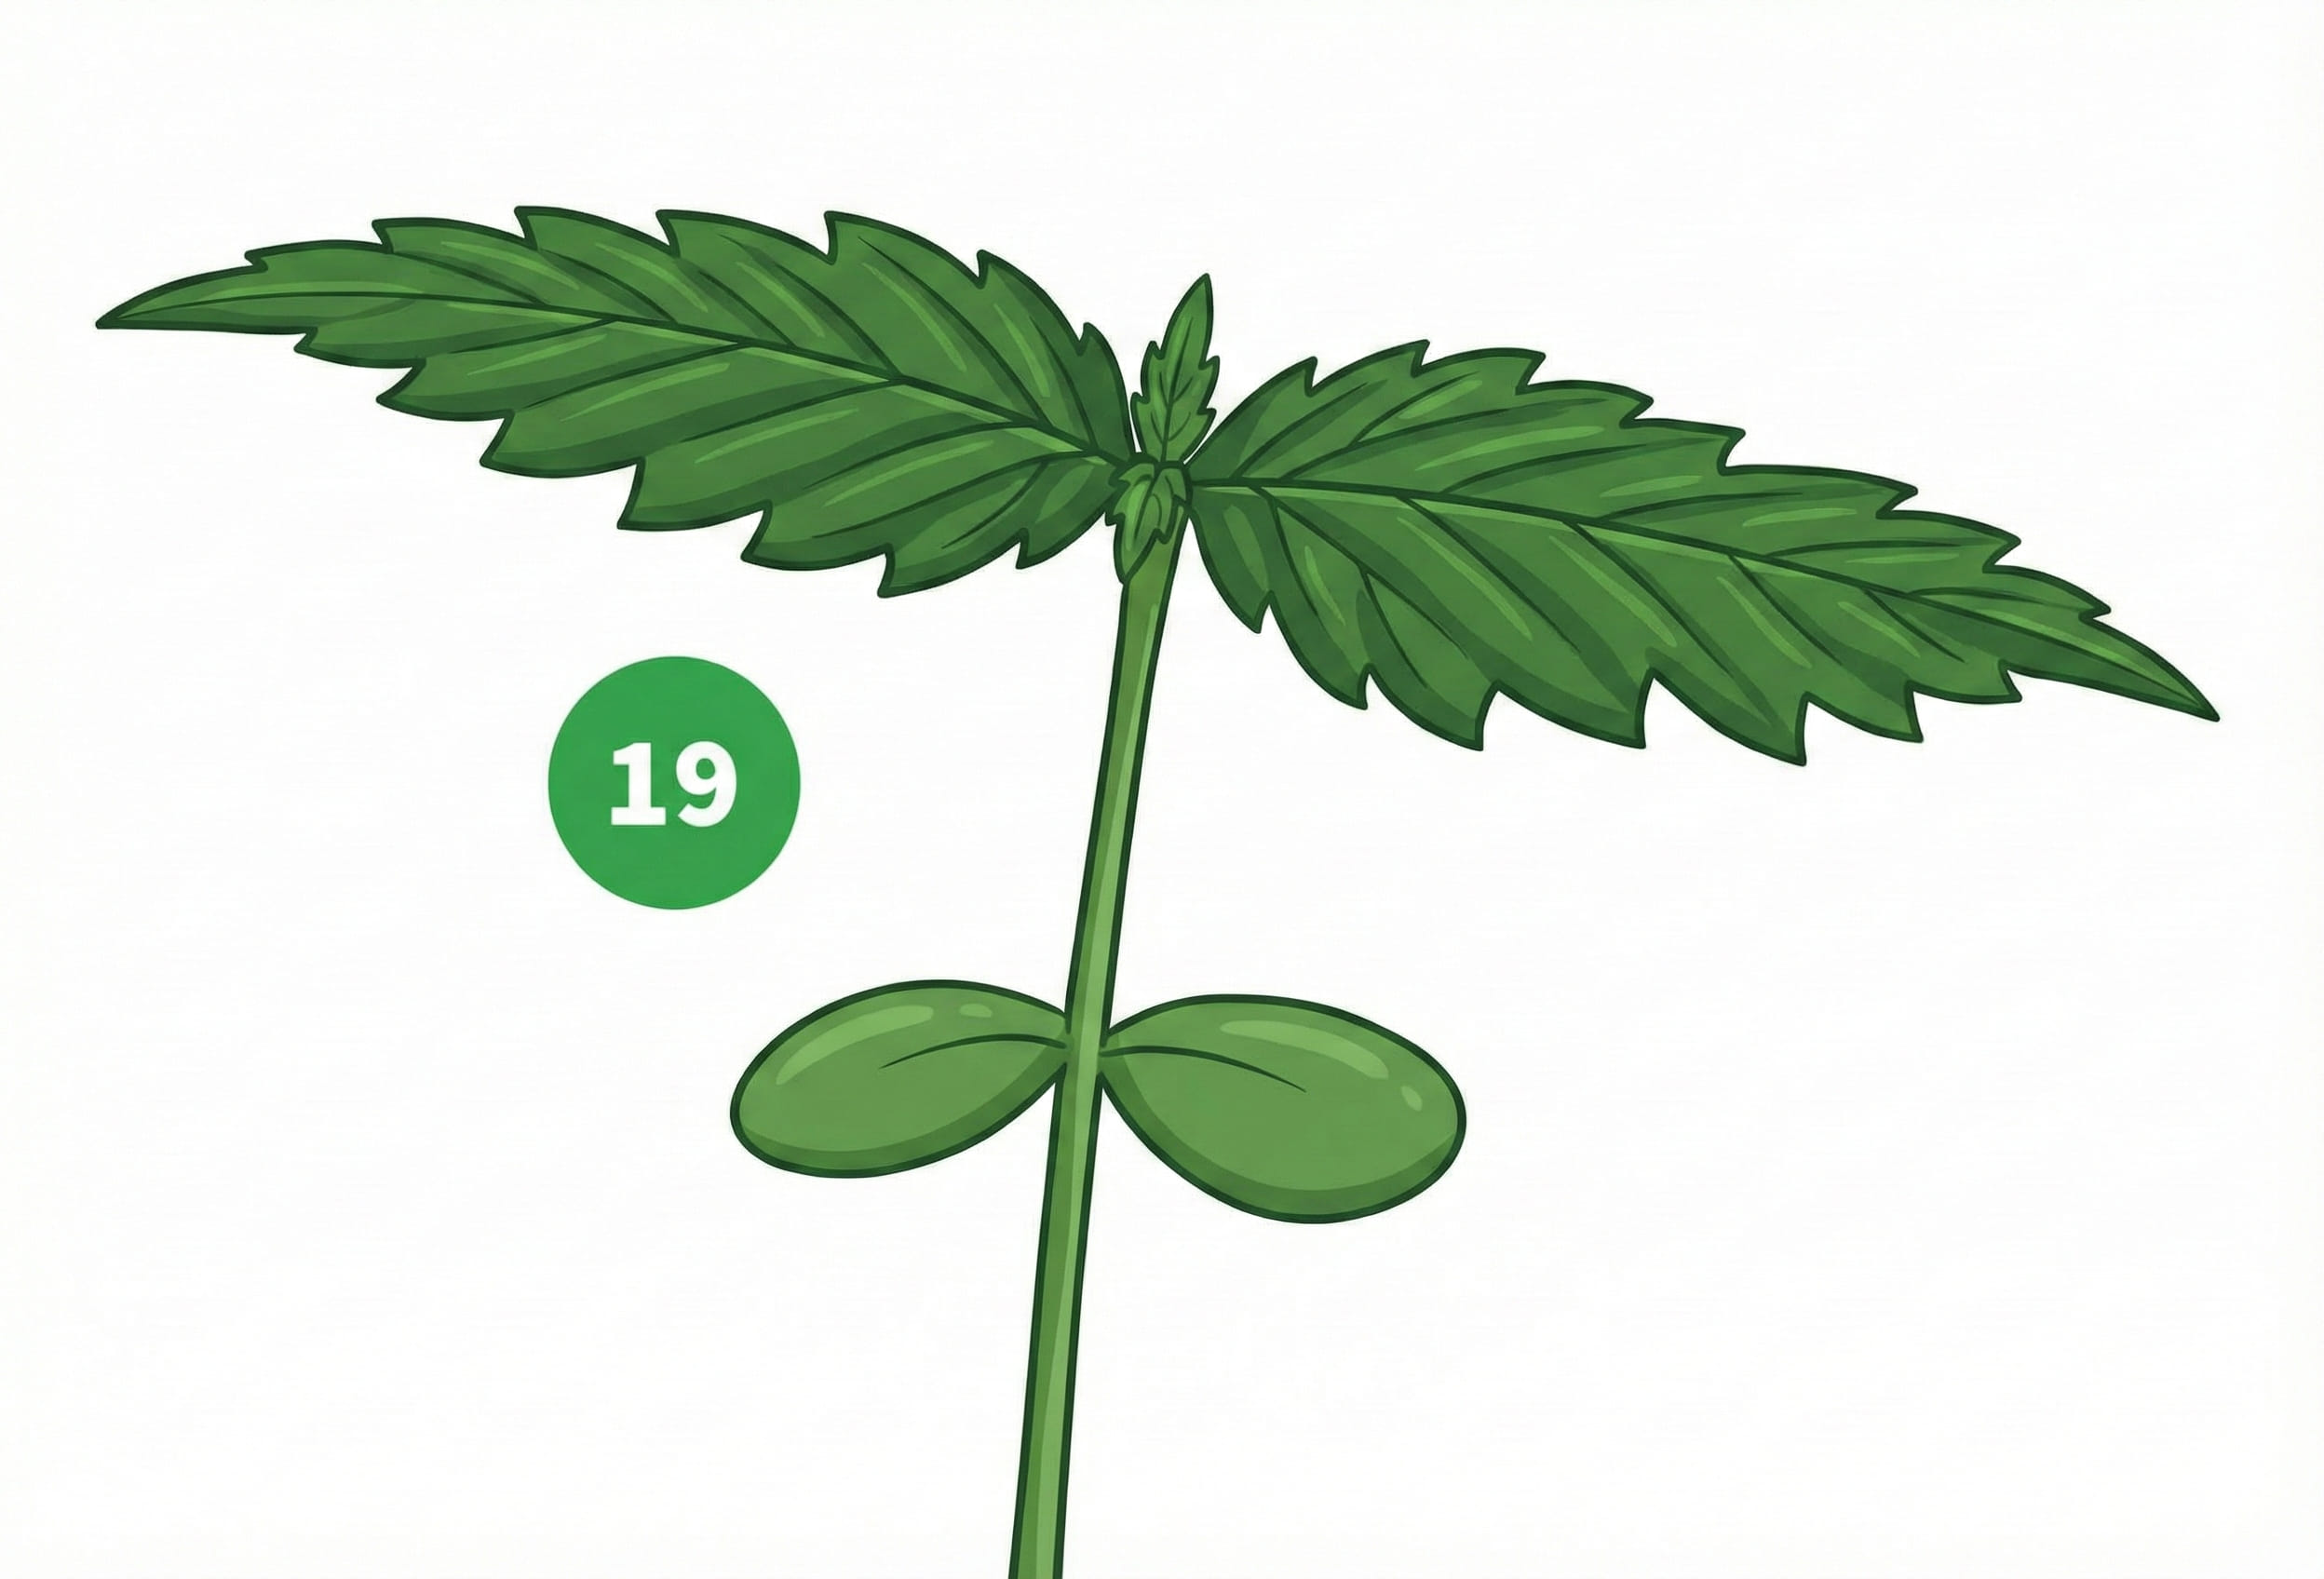
- The first leaves of the seedling are not true leaves but contain food for the young plant for the first days, like a battery. The next pair are true leaves which are single. Remove the plastic bag after the first true leaves are grown out.
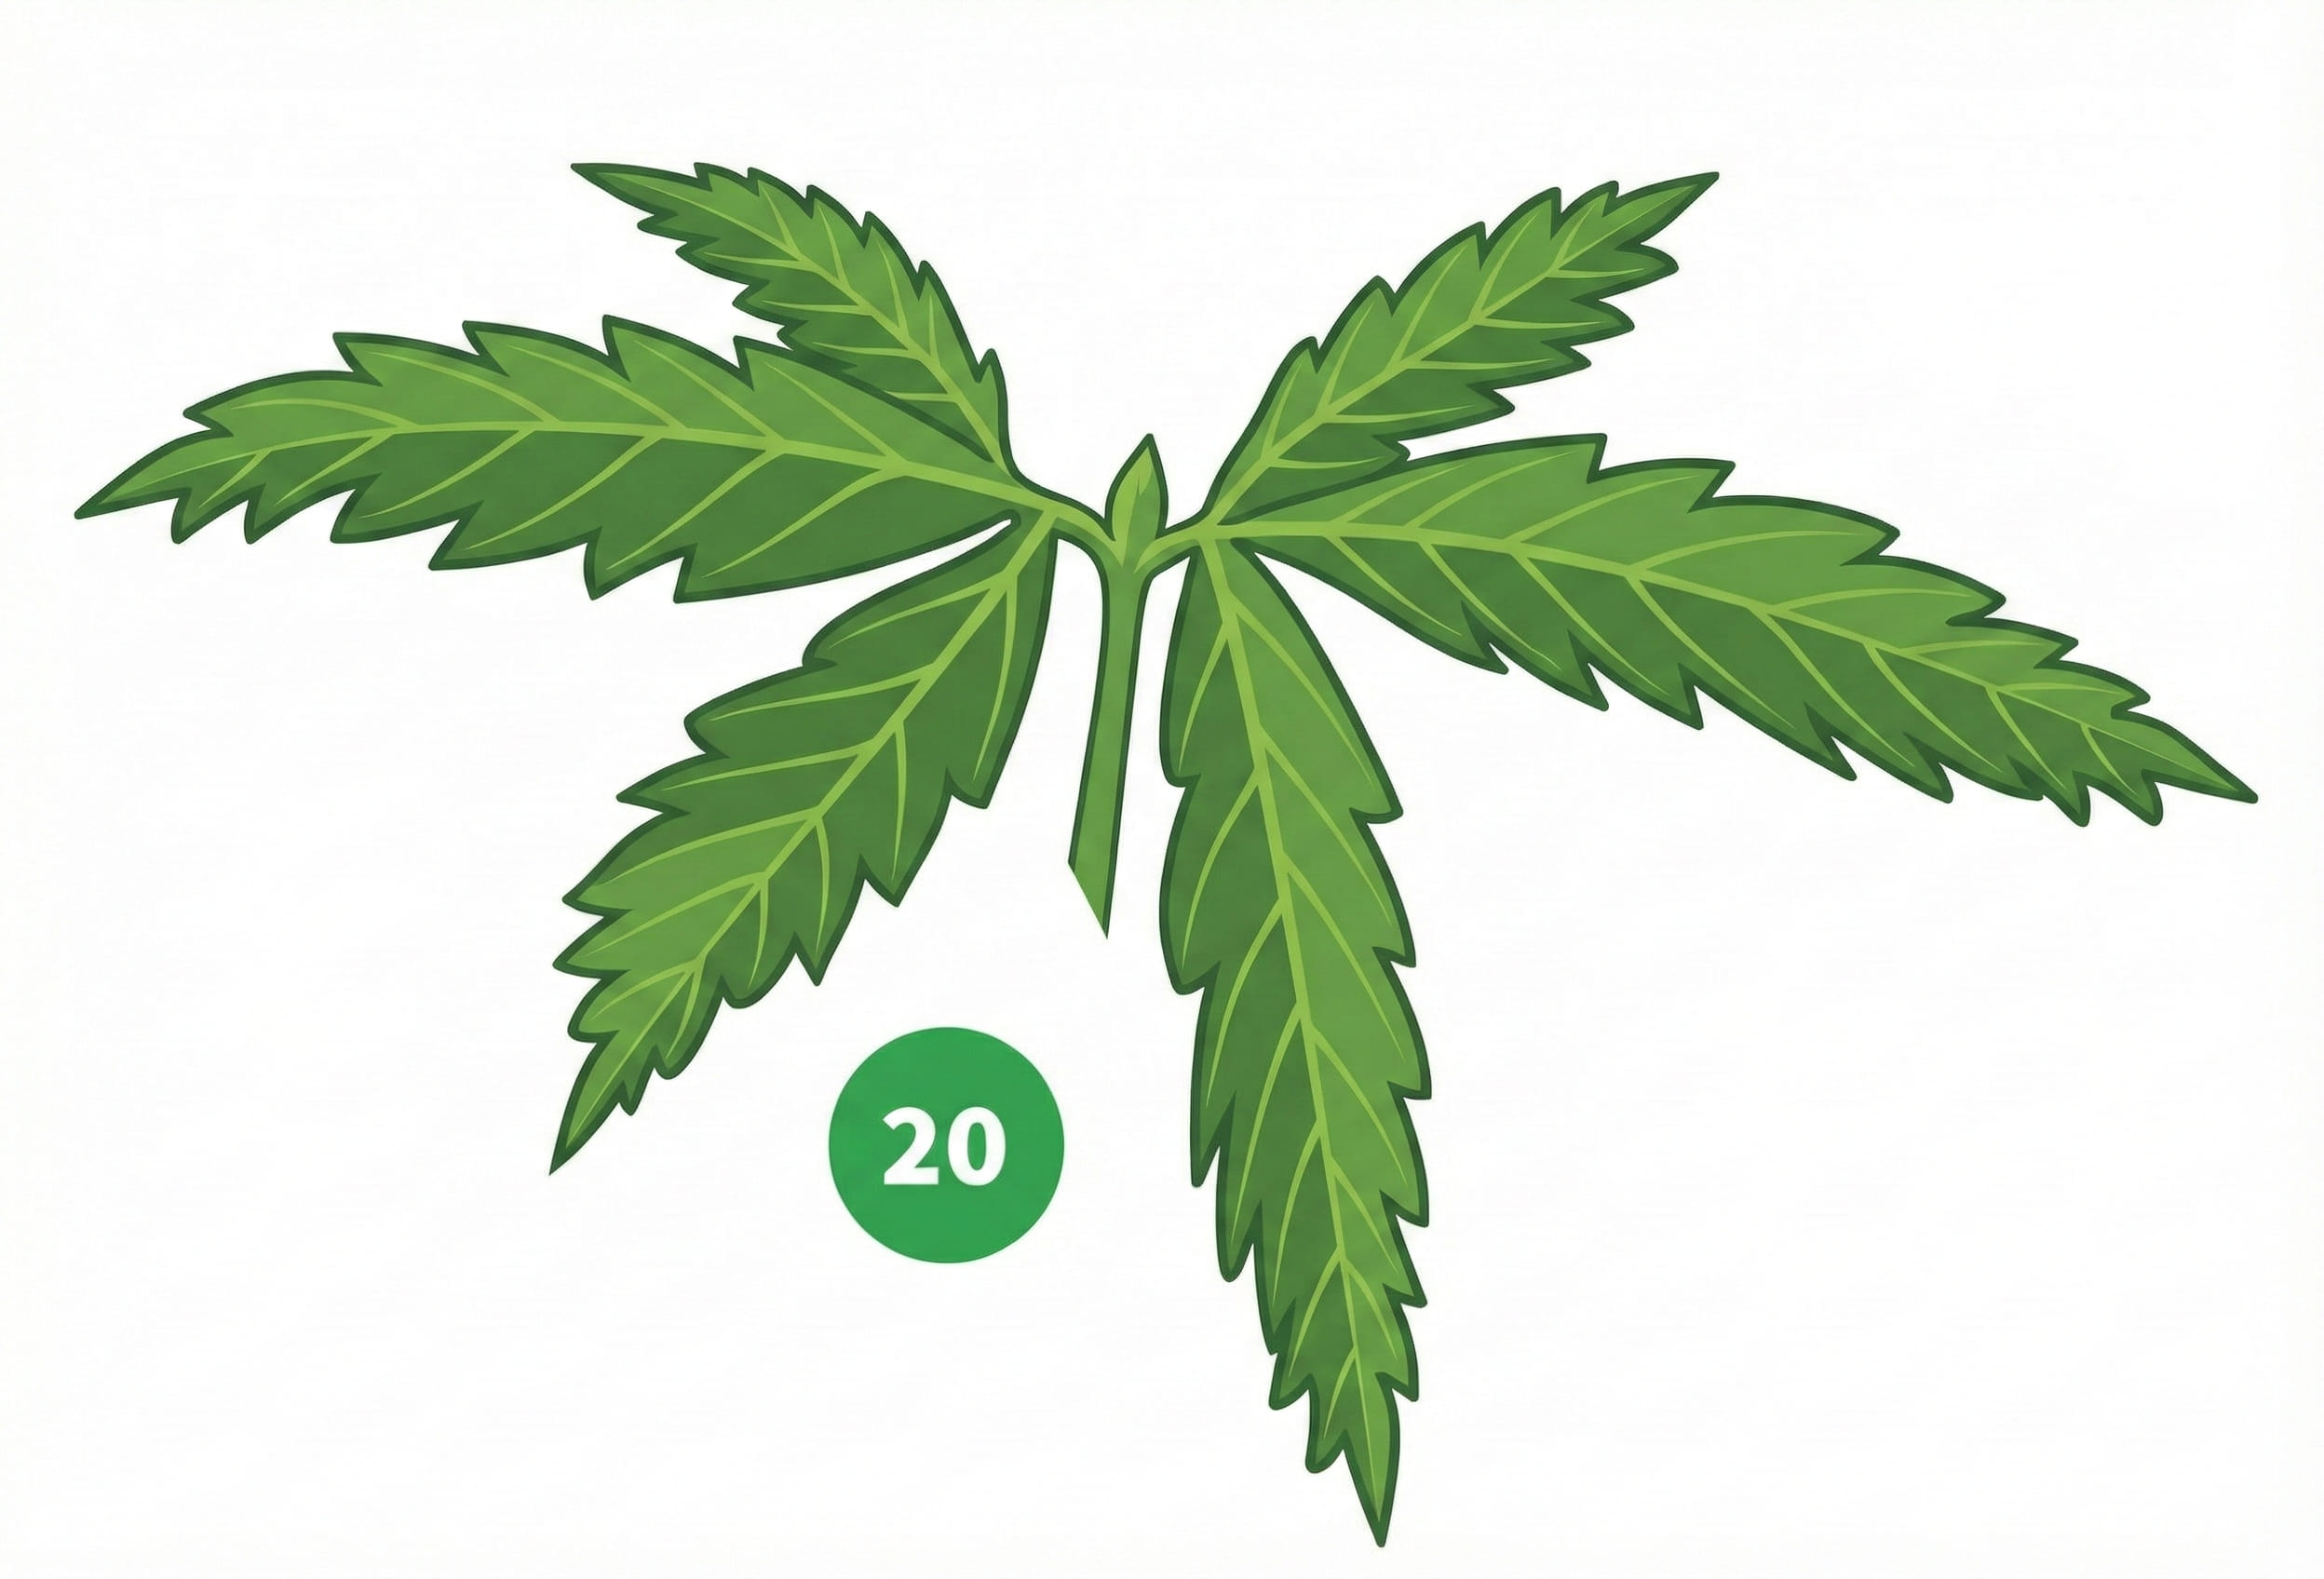
- After the single leaf pair the next leaf pair will have 3 leaflets each. The following leaf pair will have 5 leaflets, then 7 and then 9. Some plants will grow leaves with 11 leaflets. Generally: the healthier a plant is, the more leaflets it has.

- Bigger plants are less fragile and it is safer to wait till they have a couple of true leaves before placing them outside. Plants need to get used to the sun or they will burn. You can help the plant adjust to the strong rays of the sun by first putting them outside in full shade for a day or two. Then place them under translucent plastic for another 2 days, this filters the strong light. After that the plants will not burn and die when they are placed in direct sunlight.